
Advanced Reactor Assembly Manual


Advanced Reactor Assembly Manual
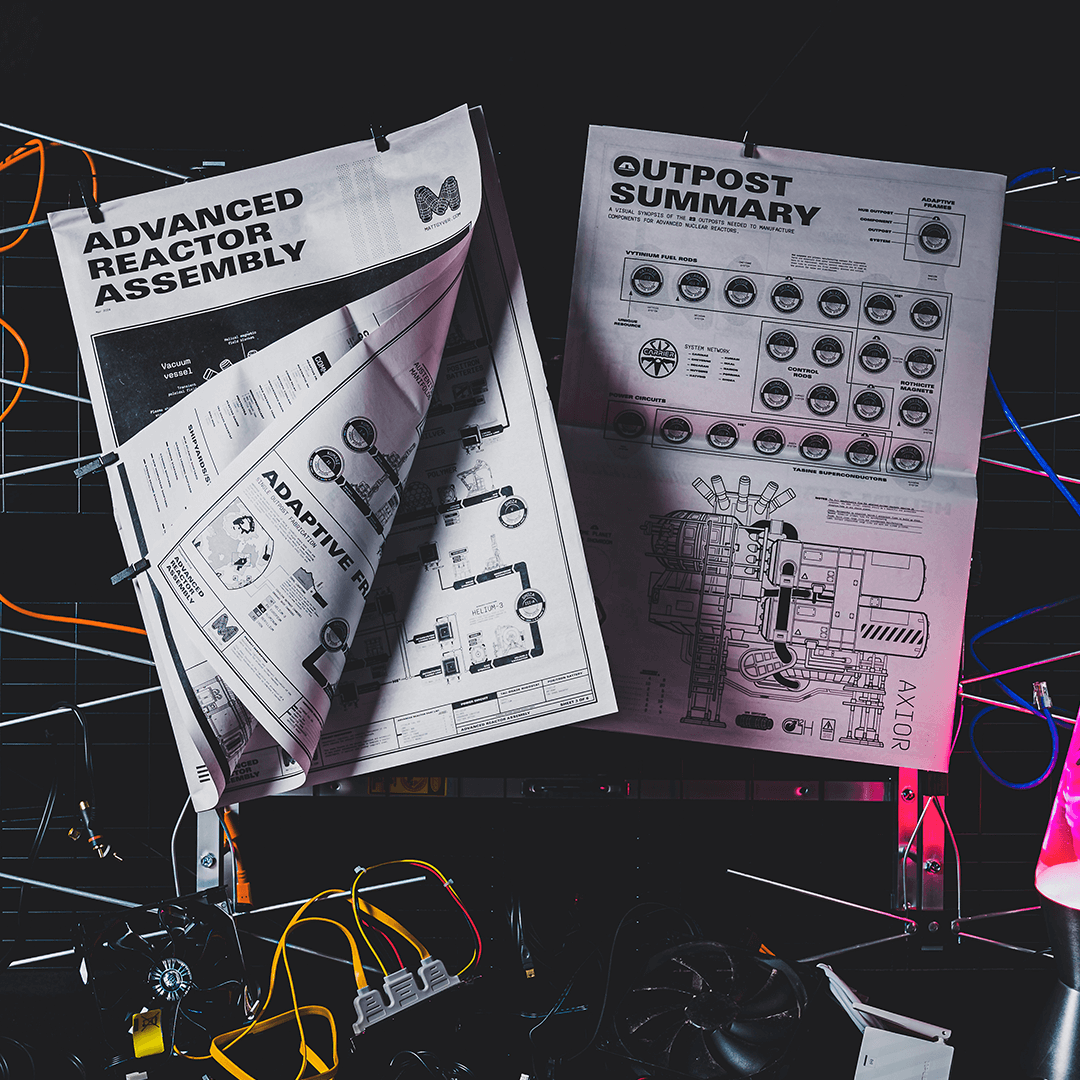
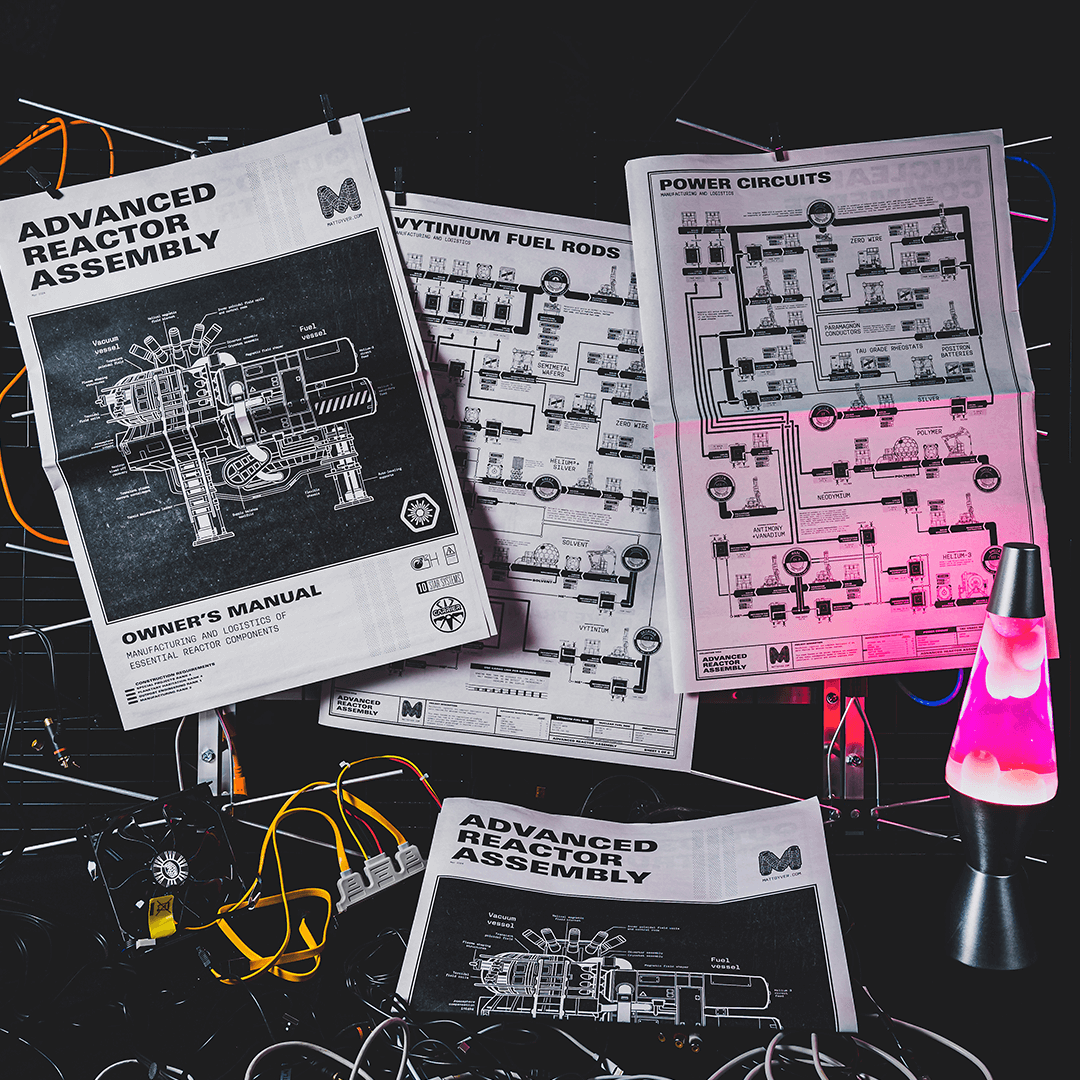
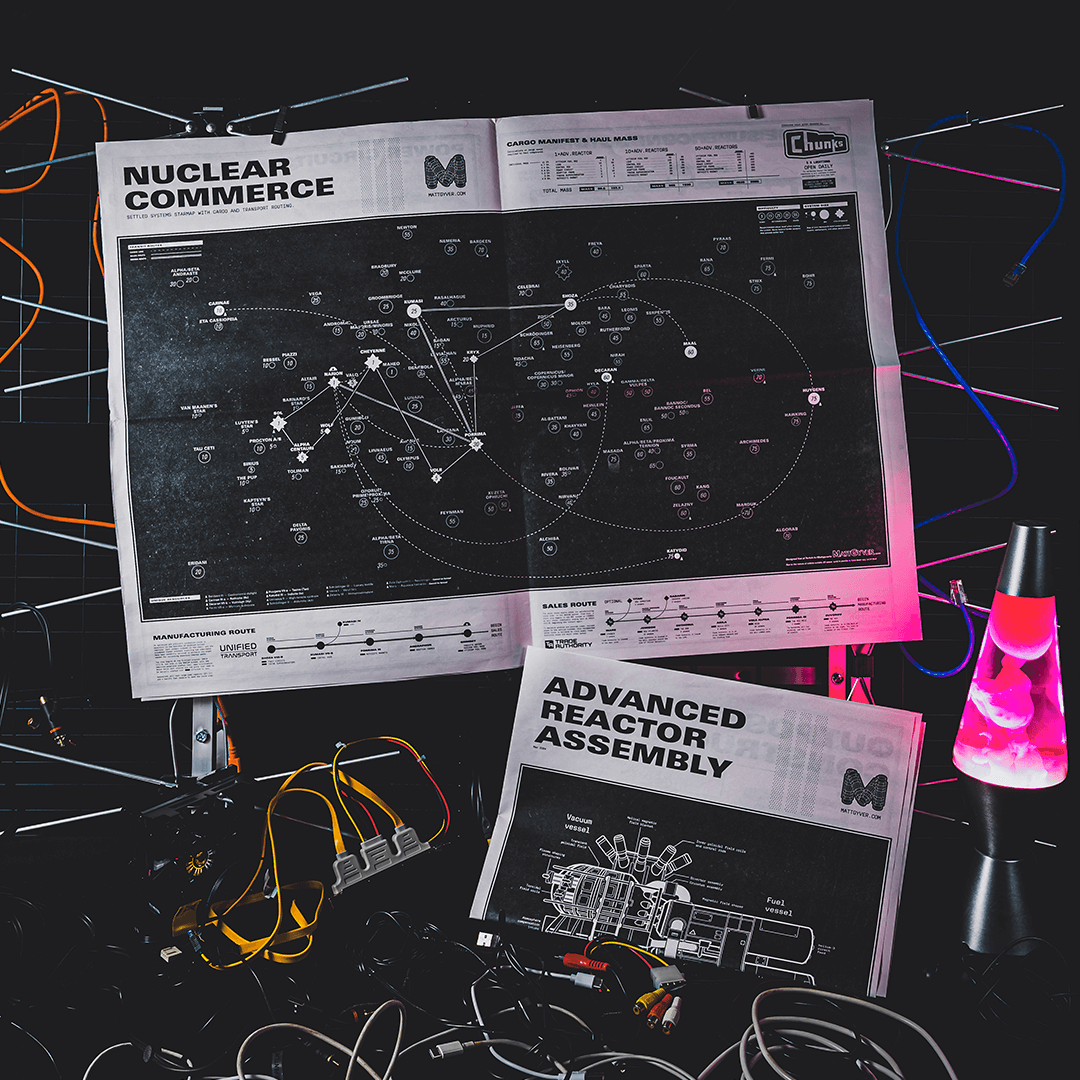
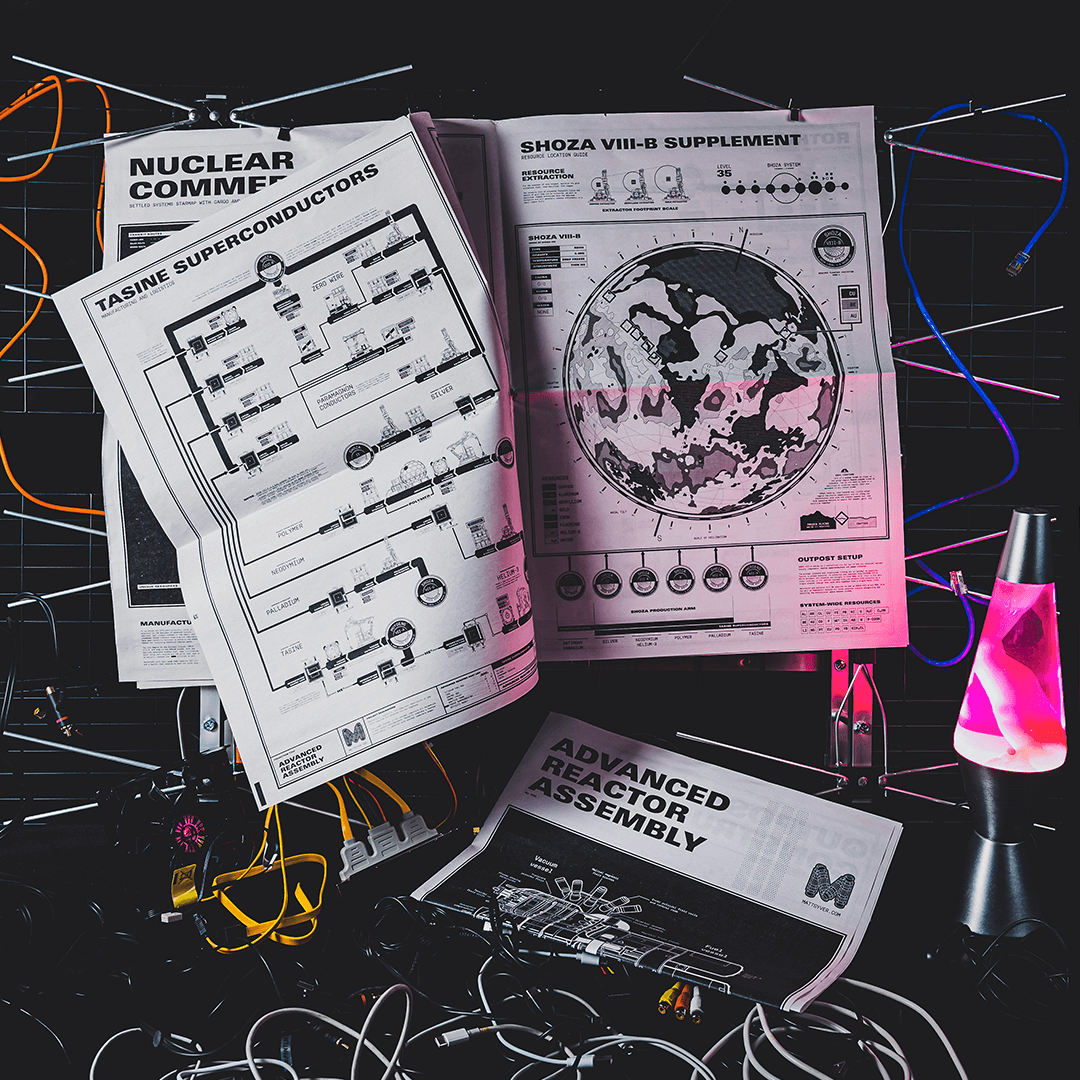
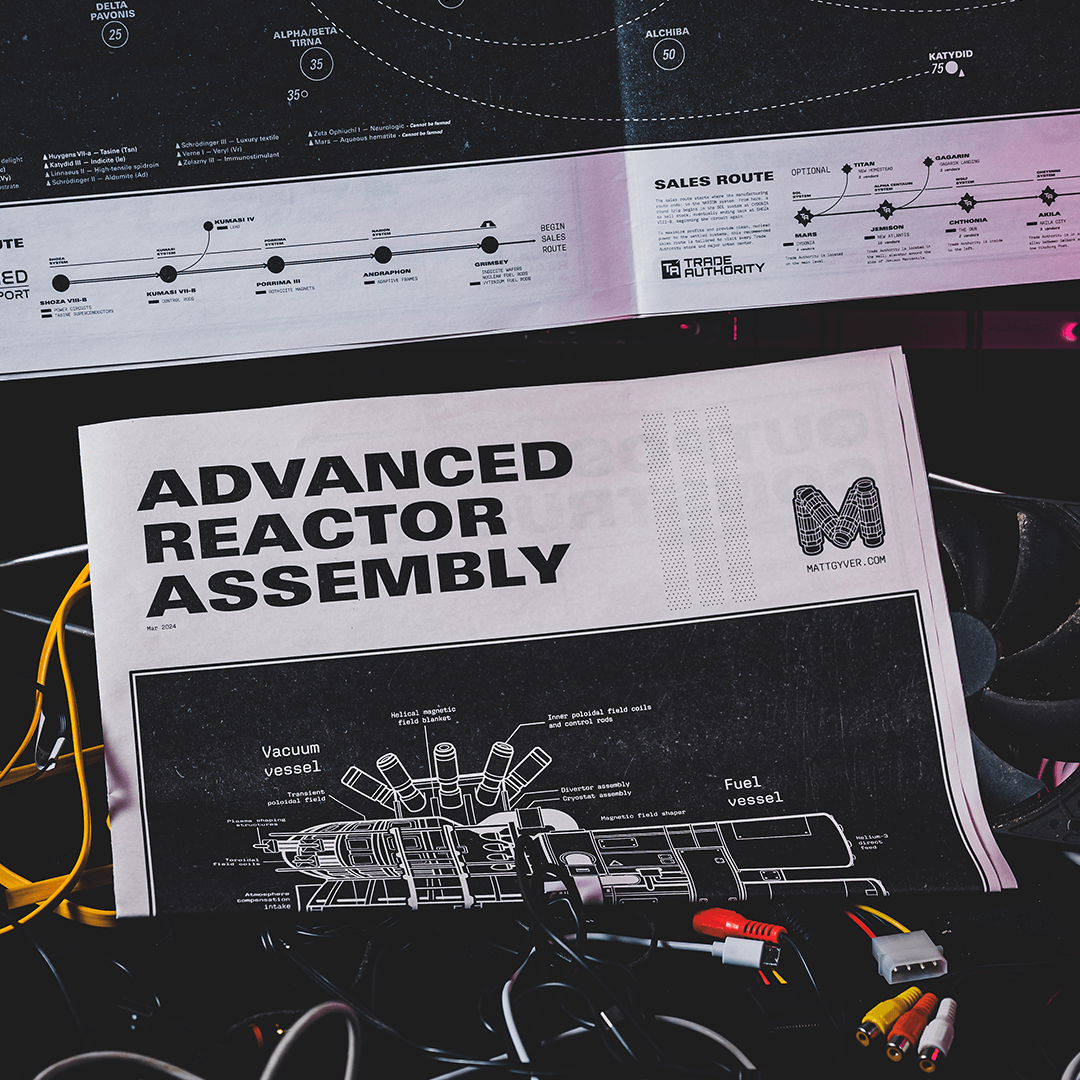
Ready to become reactor royalty or a magnet magnate? This meticulously crafted, 12-page, vintage black and white technical guide fully details the logistics and assembly of Starfield’s advanced nuclear reactor. Suitable for framing, each page of the digitally printed full size broadsheet newspaper is packed with instructions, details, schematics, and other notes needed to become the settled system’s leading provider of clean and reliable nuclear energy.
Features include:
Full-size 350mm × 500mm broadsheet newspaper (700mm × 500mm spreads).
The above dimensions mean it’s BIG; literally a 12-page newspaper.
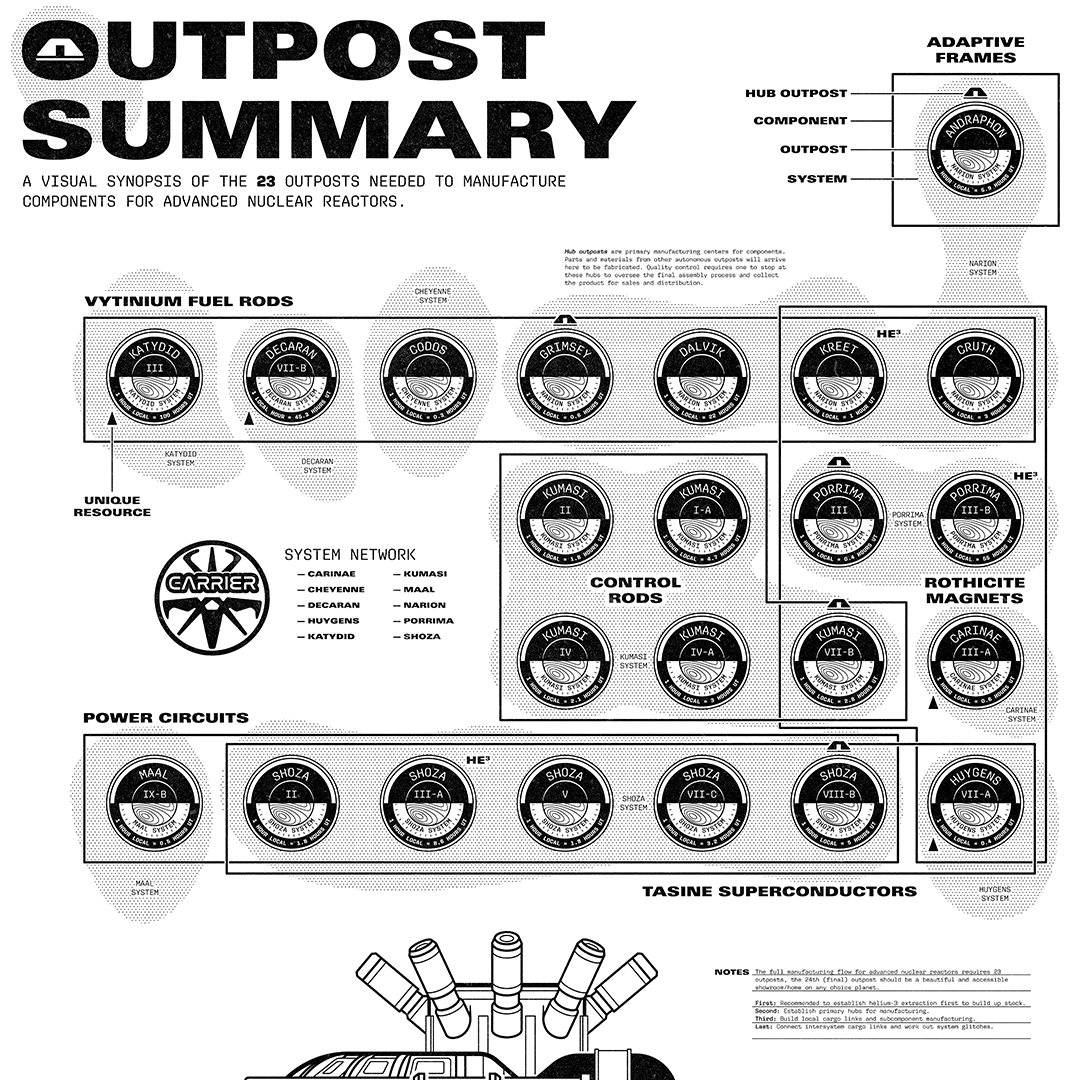
General outpost construction notes (excerpts from my Starfield Outpost).
Schematics for vytinium fuel rods, (the gold-standard XP farm), control rods, power circuits, tasine superconductors, rothicite magnets, and many subcomponents.
Helium-3 distribution notes.
A large, centerspread map with every system labeled, detailing an optimal crafting and selling route.
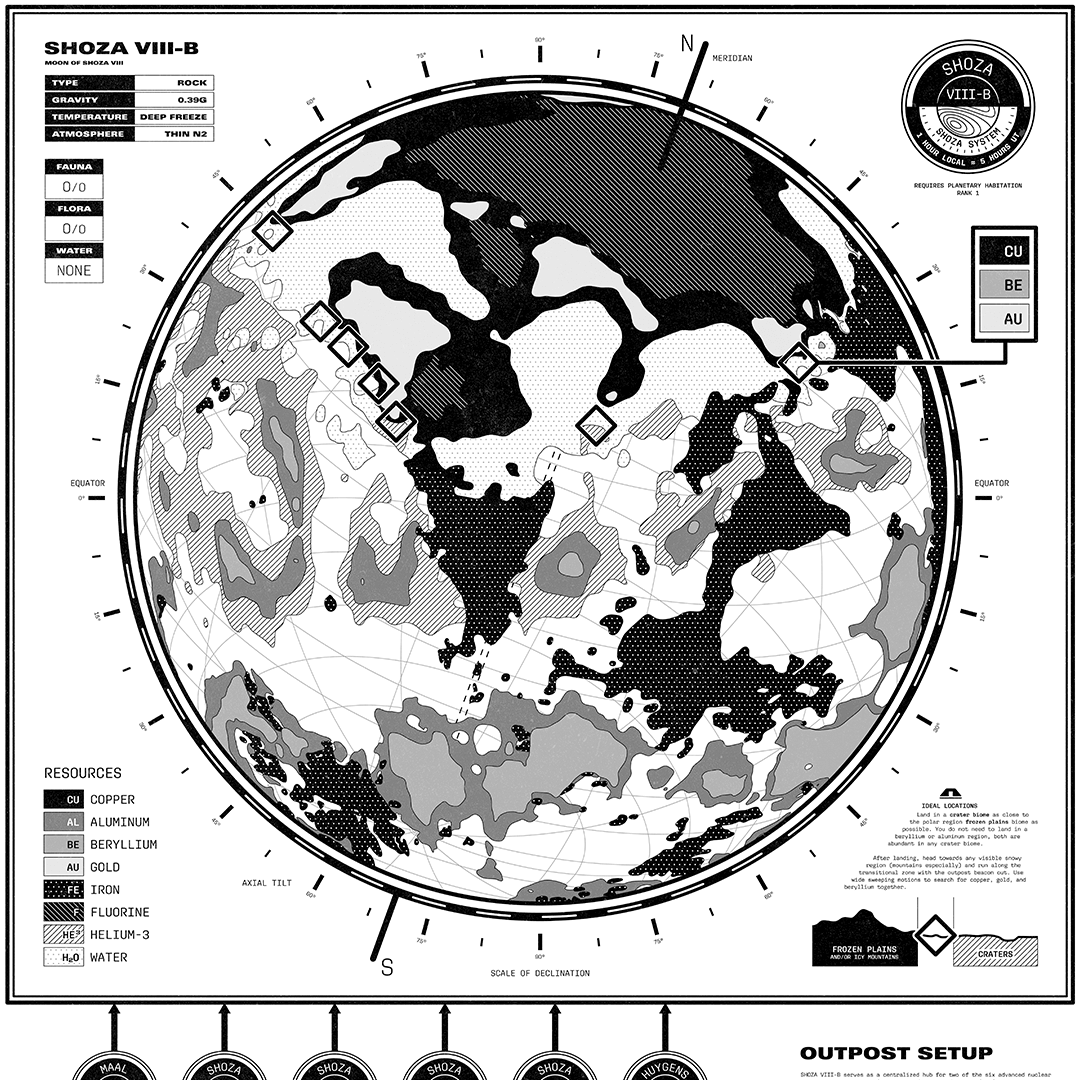
Diagrams on locating multi-biome resources.
…and much more!
For more on the creation of this including closeups and a high-quality PDF to print yourself (only if you hate newspaper ink), check out my manufacturing flow diagram article.
Addendums and Corrections
Second printing (current)—March 2024: Rothicite on Carinae III-a is a solid, not a liquid. It will be apparent once the outpost and extractors are built; the resource flow is the same otherwise. The receiving end of the cargo link on Porrima III correctly has a solid storage container. Additionally, the second page basic outpost kit mentions 2 lead (PB), twice. You just need the two, but if you’re anything like me you’re already lugging around so much more 😉.
First printing—February 2024: Minor corrections regarding the February printing (which no more copies exist, all orders are the second printing now), these only affect the noted cargo links in a few spots which will be apparent once built/connected. The new print has corrected these as well as some minor grammar adjustments.
Note on shipping: I ship these myself. Contact me before ordering from outside North America; I manually generate these orders and will get you a total cost.