
Masking in Illustrator
Overview
There seems to be exactly three ways to do anything in Adobe Illustrator, and clipping masks are no exception. This tutorial will cover the various ways to mask and clip, and when to use each — such as simple clipping masks, transparency masks, compound clipping paths, and cleaning up masked art with the pathfinder.
1. Clipping Masks
Let's start out with the simplest way to mask objects and photos — the beloved Clipping Mask. A clipping mask is a shape that only reveals artwork within its boundaries. Think of it like looking through a window; there's lots to see outside, but you can only see what's revealed through the window.
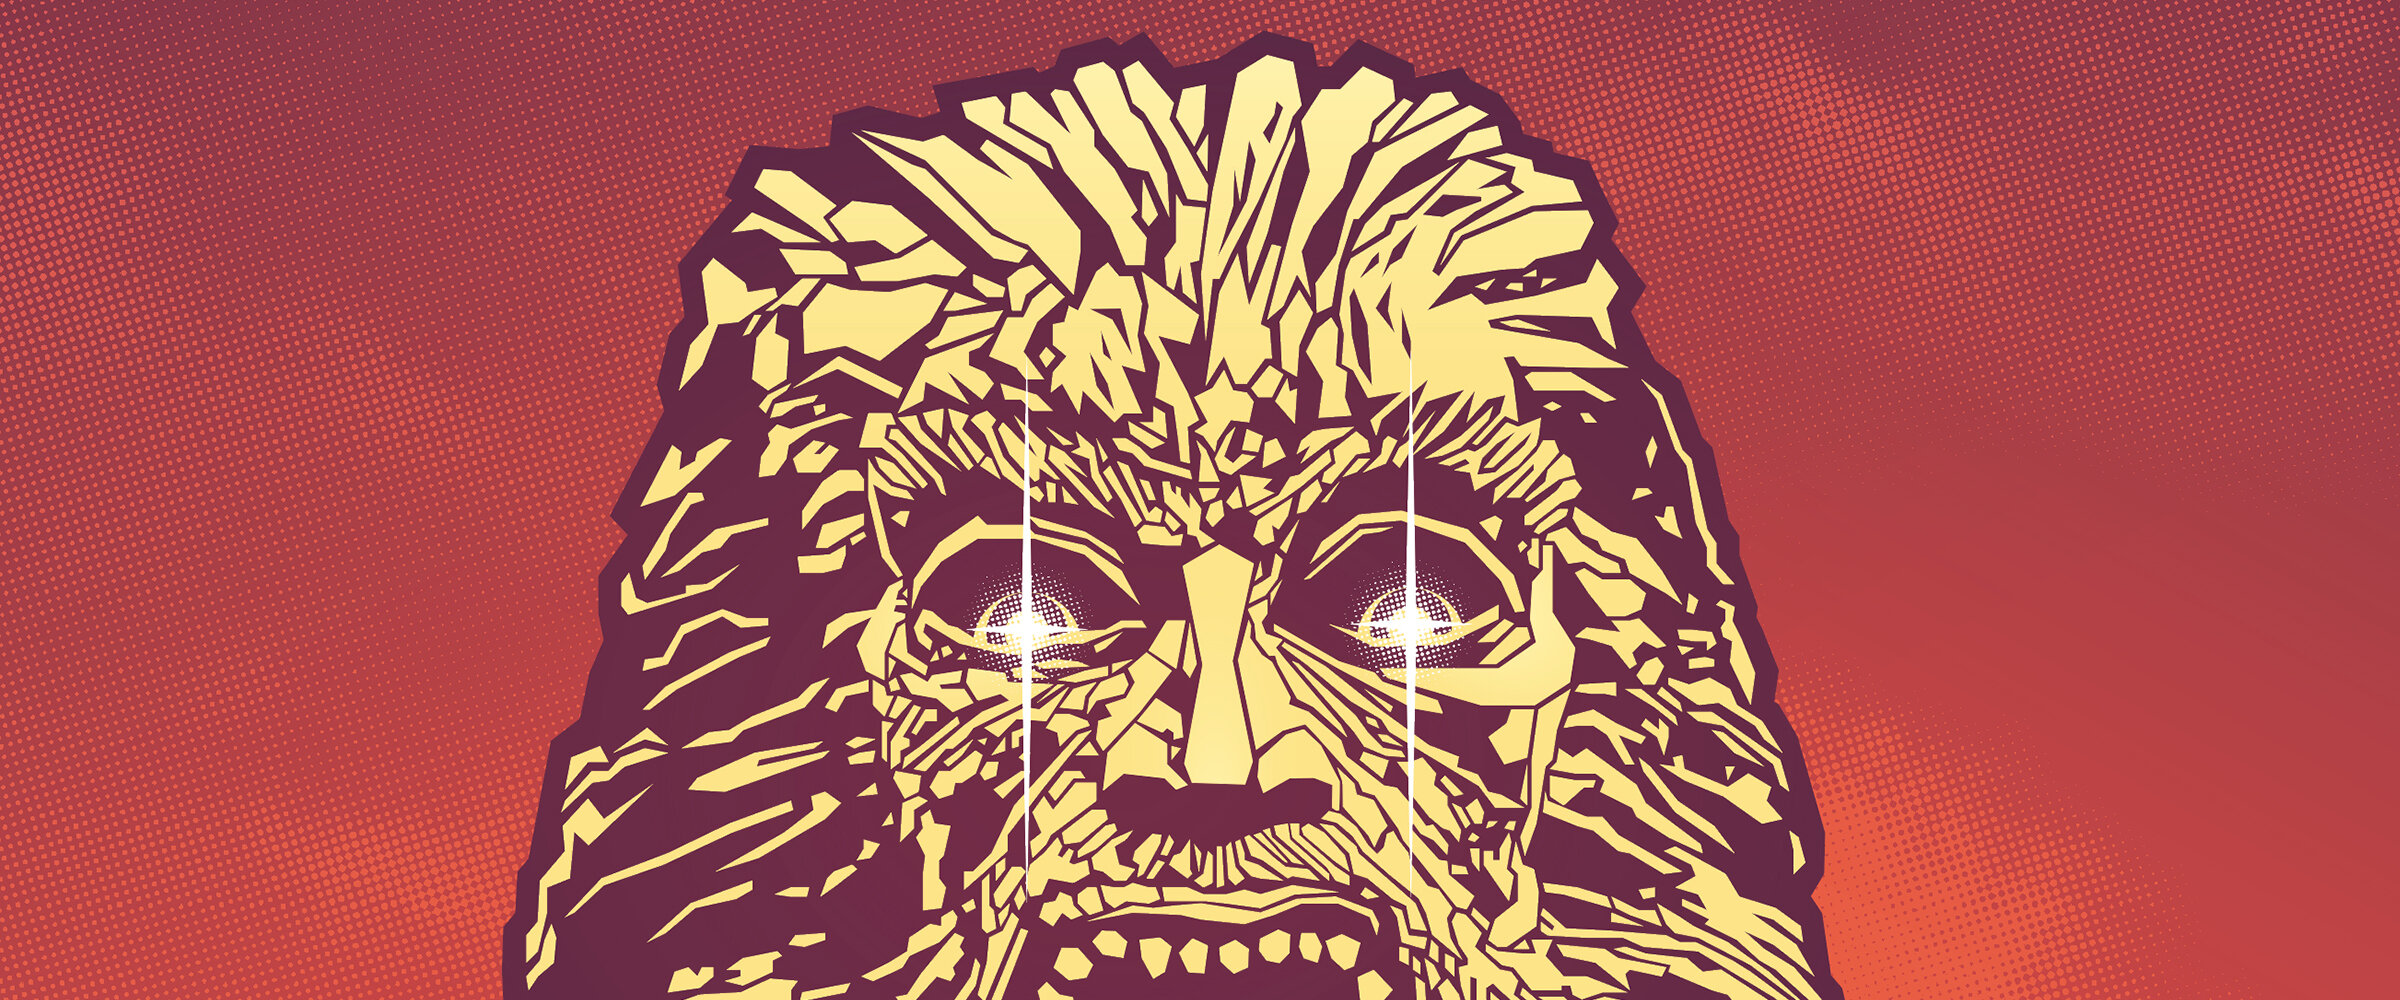
Group the artwork you want to be clipped by selecting all its pieces and pressing Ctrl+G or ⌘+G. For our example we'll use the stone head of Zardoz; I've selected all the different pieces of the mighty stone head and grouped them together. Trying to clip multiple ungrouped objects will sometimes result in only one object getting clipped. Pre-CC Illustrator was nasty about this, so old habits are still fine. The appearance panel will show the art has been grouped.
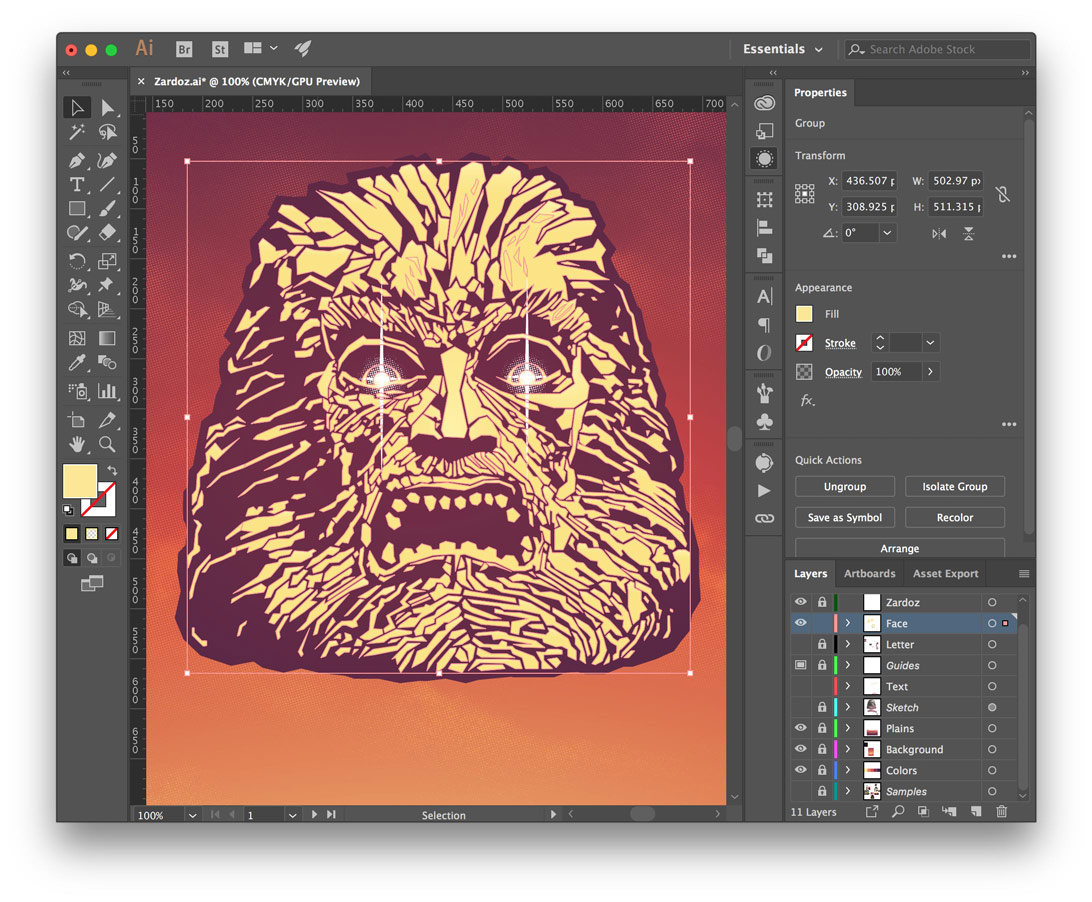

The Illustrator Appearance panel is very powerful. It indicates the mighty stone head of Zardoz is a group.
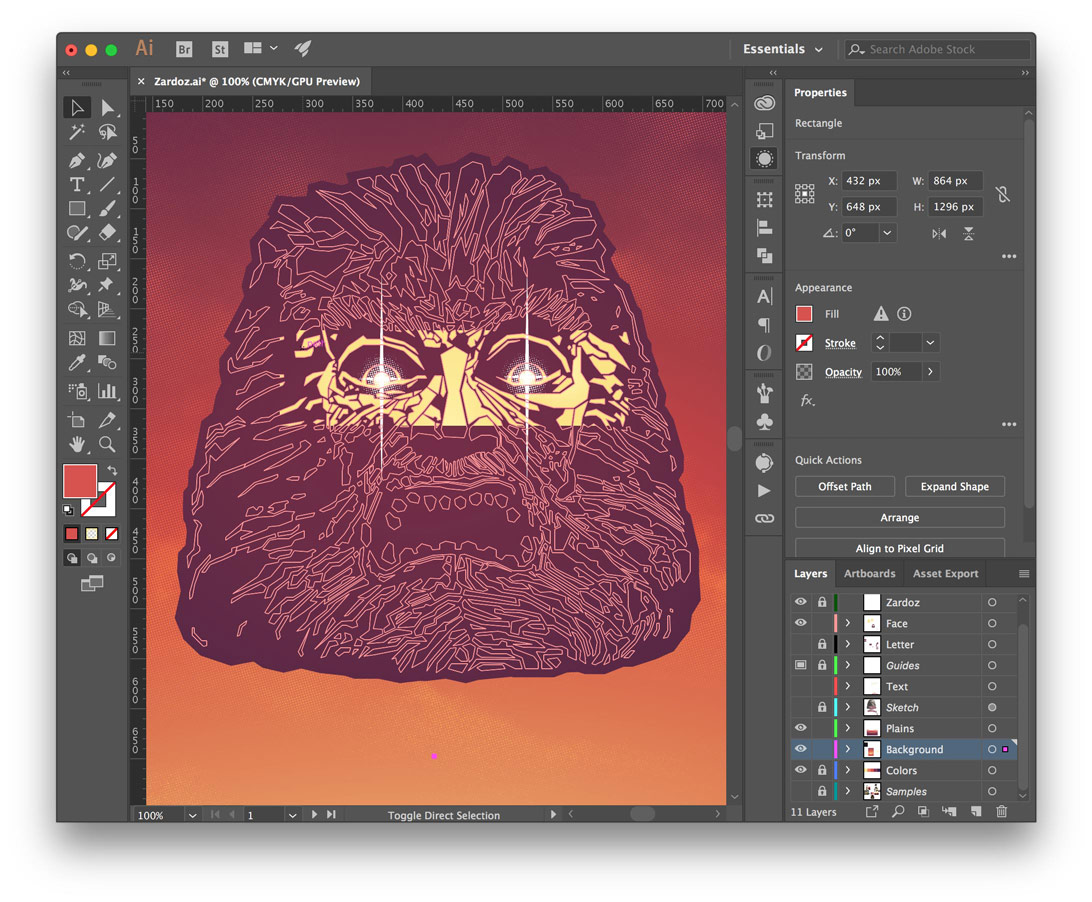
Place the shape you wish to use as a clipping mask on top of your grouped art. Make it a wild color so it's completely obvious this is a mask. I find this helpful because un-styled paths are easily lost or forgotten, especially when working with complex designs. Let's mask the eyes of Zardoz with a simple rectangle.
Select both the art and the intended clipping mask. You should have exactly two things selected — one art and one mask, and the mask is on top.
Make the mask with Object > Clipping Mask > Make (Ctrl+7 or ⌘+7). Only the eyes of Zardoz will be visible within the boundary of the clipping mask. You can also release the mask with Object > Clipping Mask > Release (Ctrl+Alt+7 or ⌘+⌥+7).

Once clipped, the mask borders can easily be adjusted with the direct select tool. Double-clicking into the object or mask will let you continue editing your art in isolation.
If the clipping mask is going to be permanent and you want to remove all the unseen paths, open up the Pathfinder and click the Crop icon — the mask will be destructively applied to the art.


The often misunderstood Pathfinder tool. Feeling lucky? The Crop button will remove all the unseen paths from your masked art.
2. Compound Clipping Masks
A compound clipping mask simply means the mask is comprised of many different shapes. Instead of a simple rectangle like the first example, we'll use a more complex shape, such as the Zardoz logotype.
Just like before, group your artwork to be clipped (Ctrl+G or ⌘+G). We'll be masking this background landscape scene into a logotype. All the layers in this scene have already been grouped together.

Next, select all the shapes you wish to use as the clipping mask and convert them into a compound path with Object > Compound Path > Make (Ctrl+8 or ⌘+8).

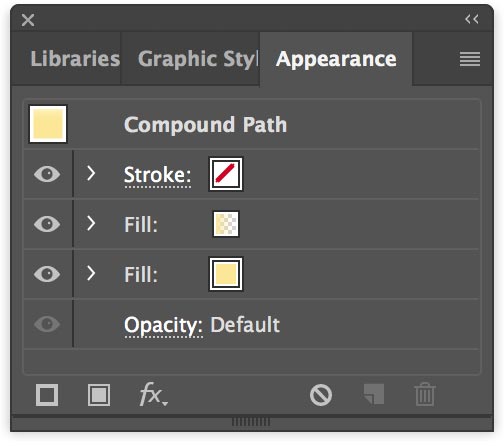
Compound paths behave like a single object. Notice the fill and strokes are editable, unlike a group.
A compound path is similar to a group, where many objects or shapes behave as one. The difference between this and a group, is that a group is a container full of objects, whereas a compound path is a single object made of many shapes — these shapes will all behave as one, and will all share the same attributes such as strokes, fills, etc. Ponder that for a moment.
Select both the art and the compound clipping mask. You should have exactly two things selected — one art and one compound path, and the compound path is on top.
To make the mask, do the same as before: Object > Clipping Mask > Make (Ctrl+7 or ⌘+7).
3. Transparency Shape Masks
Up until now, a clipping mask would only let you hide and reveal artwork — the artwork is either visible or it isn't. A transparency shape mask is a mask with varying levels of transparency and lets you use gradients and patterns to mask artwork in exciting ways. We'll use part of the Zardoz logotype and make something new.
Once again, group your artwork to be clipped (Ctrl+G or ⌘+G). Select the grouped art and make a copy of it (Ctrl+C or ⌘+C). You'll want the copy for the next step. Now open the Transparency panel.

Click the Make Mask button; this will completely hide your artwork for now. By default everything is masked and hidden. Remember the rhyme: black conceals, white reveals — like the black mask of a bank robber; you can't see their face — just like how you can't see your artwork.
Select the black Opacity Mask in the transparency panel. This will put you into mask editing mode. Anything placed in the transparency mask will only be used to mask artwork. Go ahead and paste the copy of the logo from earlier in front (Ctrl+F or ⌘+F) and make it white. This will reveal the logo linked to the mask.

All the artwork is hidden behind the mask.

The ZA logo is revealed by the white ZA shape in the mask.
Let's start adding black and white gradient boxes inside the opacity mask. Try to stick with black and white only (black will fully conceal, white will fully reveal) — colors and anything in between will only partially mask. Here I've added a single gradient box inside the mask.

A black and white gradient shape added to the opacity mask.

Continuing with this theme, more gradient boxes have been added everywhere the logo intersects itself. You can see the how the design starts to have an overlapping woven appearance using nothing more than the gradient shapes in the opacity mask.
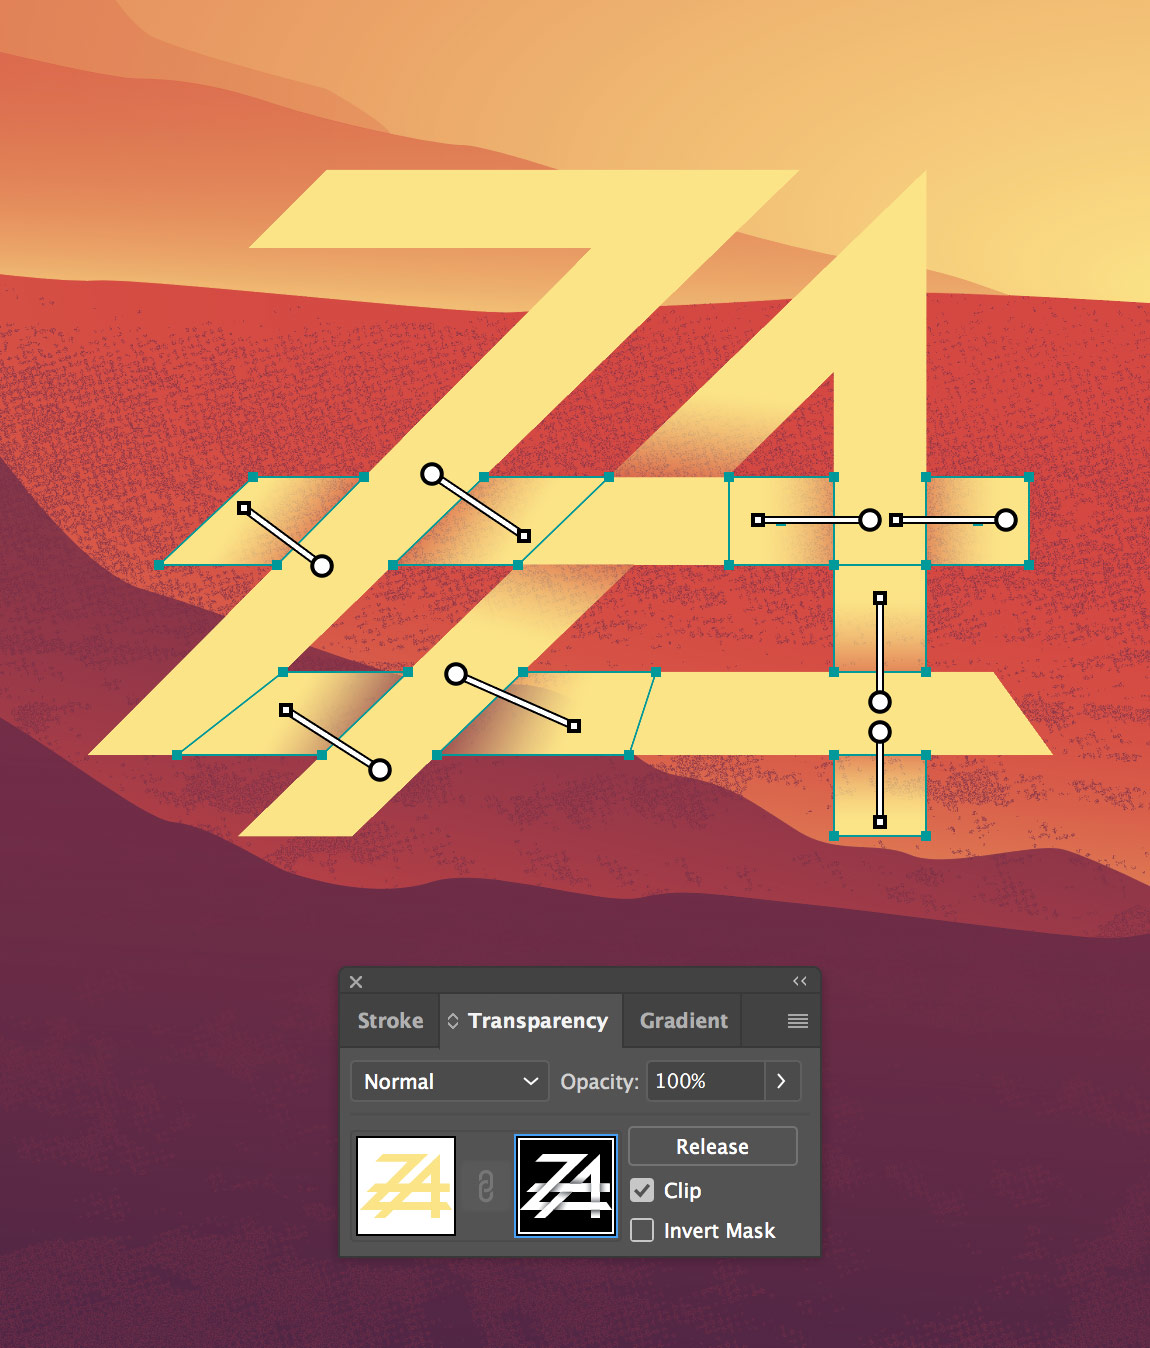
Most of the gradient boxes have been highlighted in this opacity mask.

A note on editing opacity masks: while you are in the mask editing mode, the rest of your document is protected — it's not possible to interact with anything other than elements within the opacity mask. Once you're finished editing, click back over to the layer inside the Transparency panel to leave the mask and resume editing the rest of the art.
4. Transparency Layer Masks
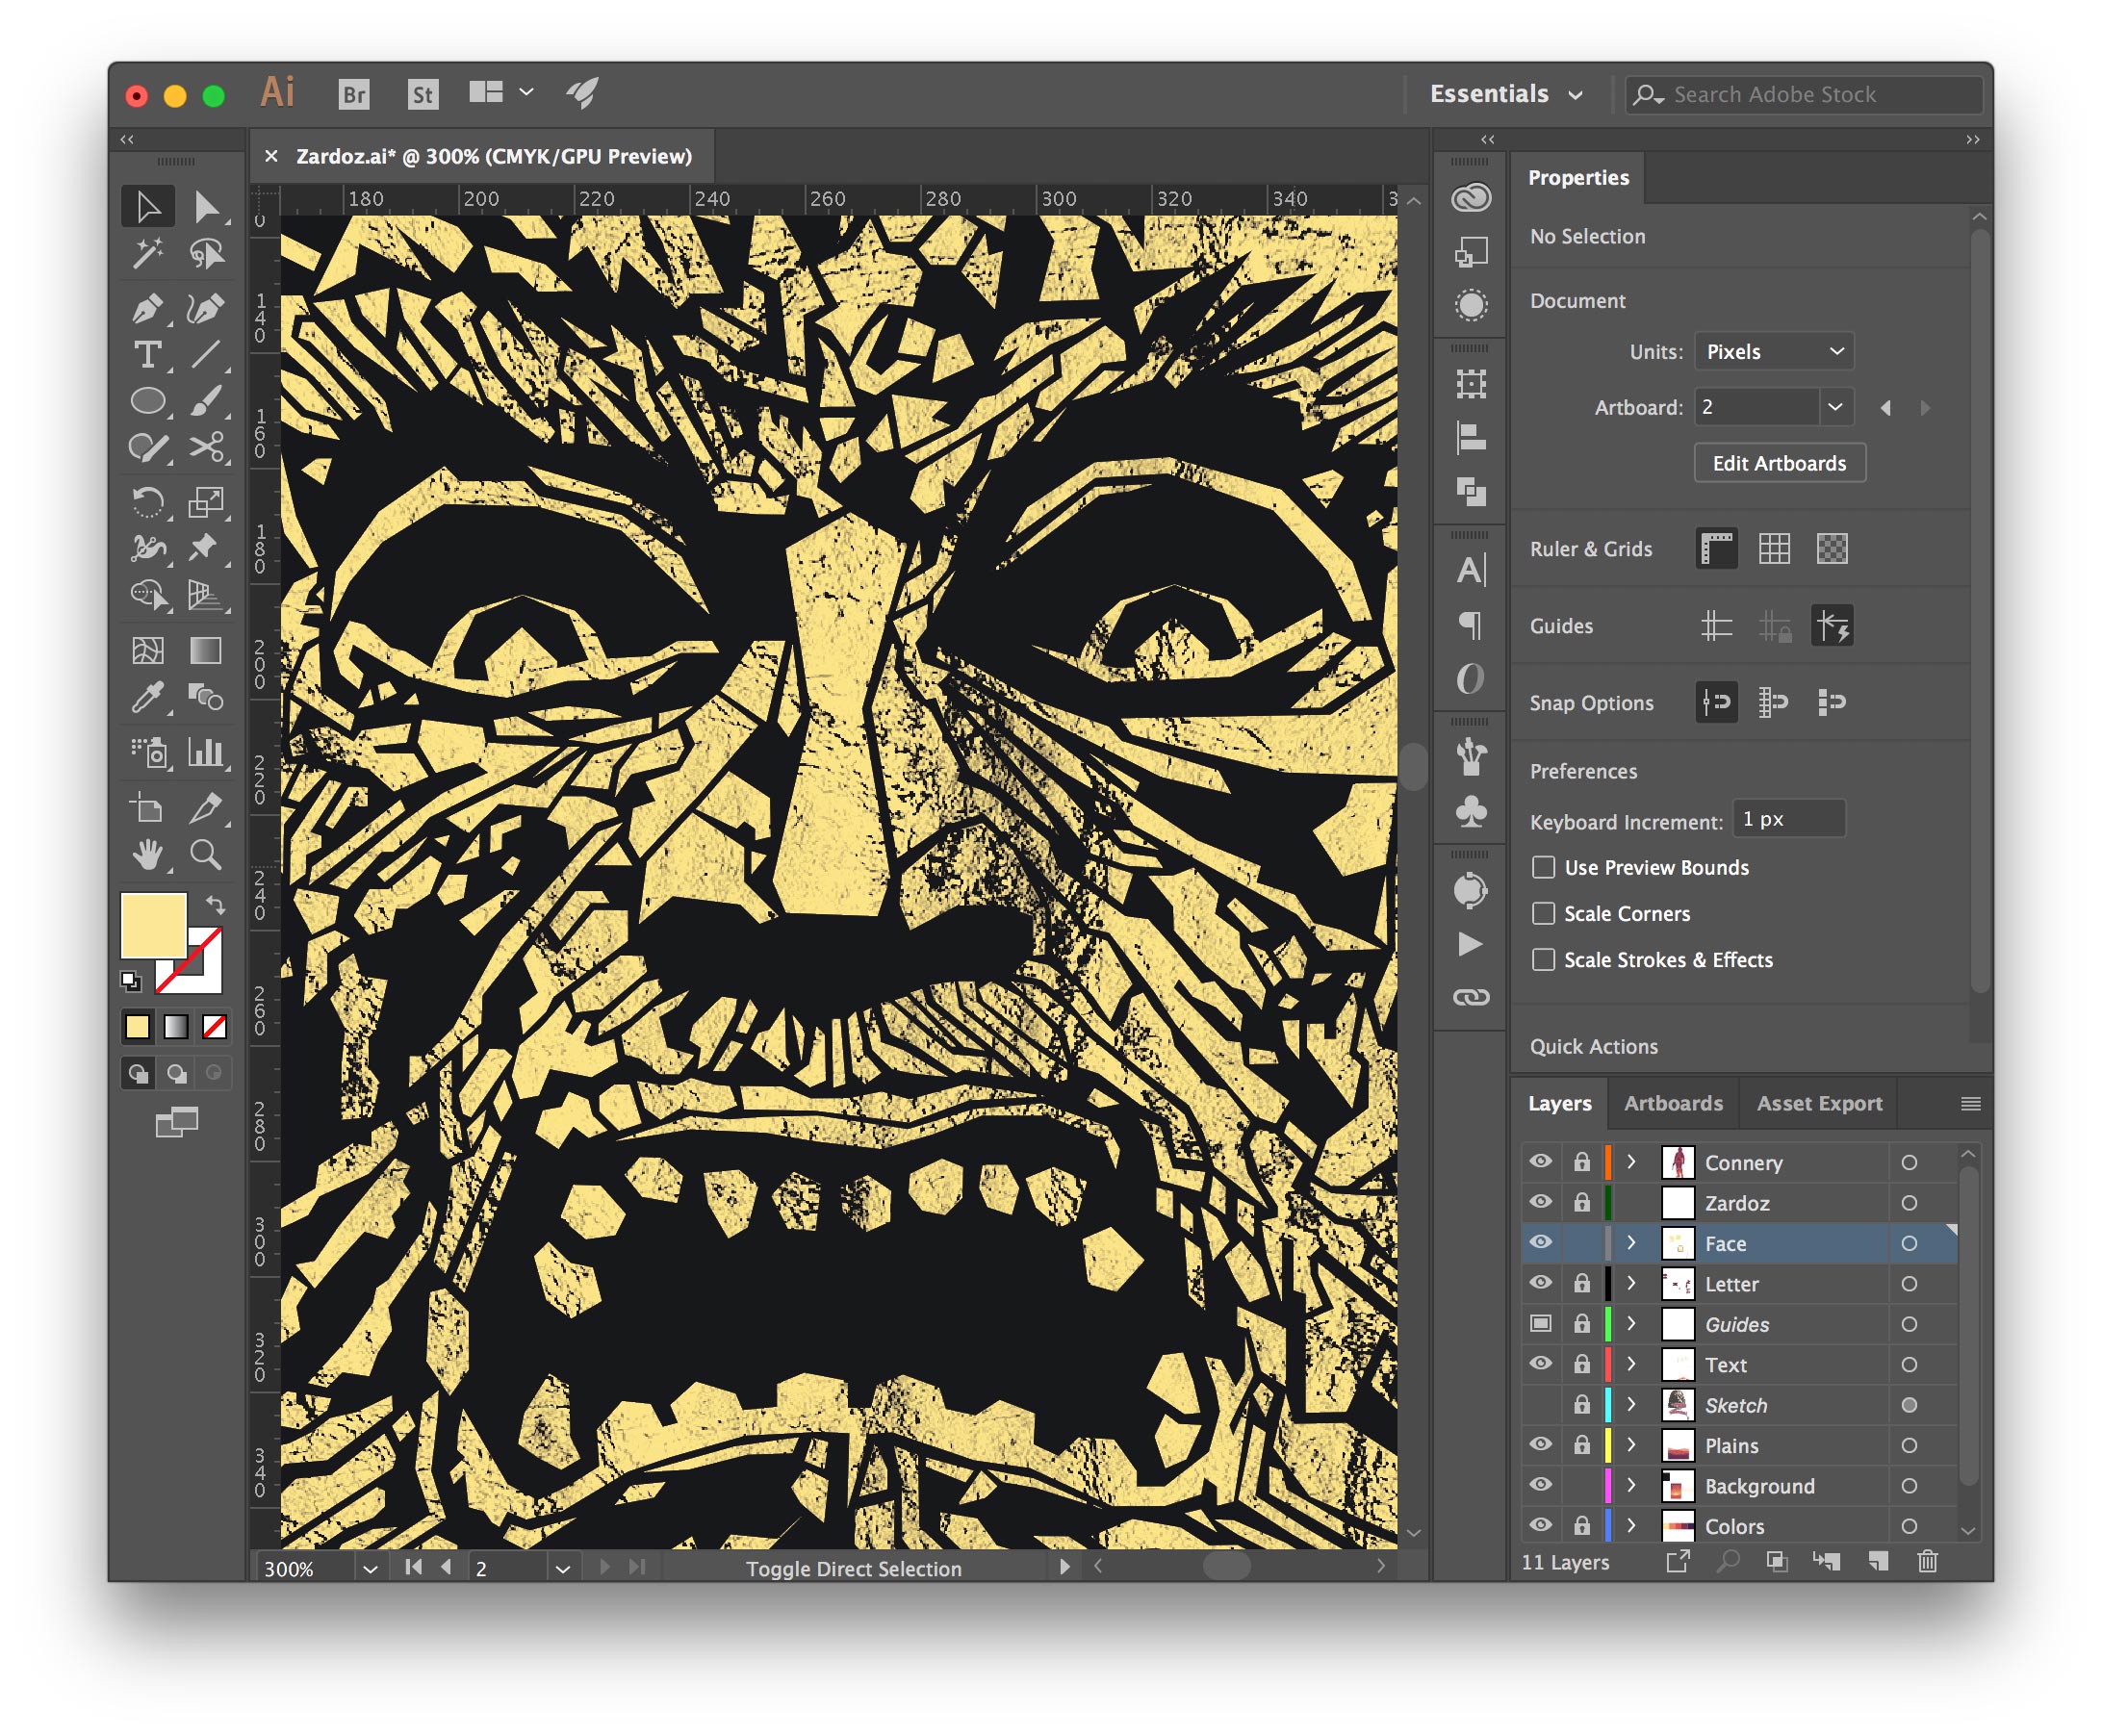
A transparency layer mask is basically a single large image that acts as the transparency mask. The light and dark values in the layer (or imported photo, texture, whatever) determine the amount of masking applied to your art. For this example let's go back to the mighty stone head of Zardoz and apply a layer mask.
Group your artwork to be clipped as before (Ctrl+G or ⌘+G) and import a photo or texture into your Illustrator document. Place the imported texture or image on top of your art and select them both.


Open the Transparency panel and click Make Mask. Experiment with the Clip and Invert Mask options to see the different mask behaviors. By default, the white areas will reveal and the black areas will conceal.
You can select the Opacity Mask in the transparency panel to further refine the mask placement, scale it up or down, and add more masking elements. Here is the final texture layer mask, giving Zardoz that vintage t-shirt graphic look.


Wrapping Up
Now that you know there's more to masking in Illustrator than Clipping Mask > Make, go forth and use these new mask powers to hide parts of your design that you don't want anyone to see.
Oh also, Zardoz shirts are available here.
