
Using the Perspective Grid in Illustrator

Overview: A step‑by‑step Perspective Grid tutorial using a two‑point perspective illustration inspired by the house from Ponyo.
The perspective grid is one of the more obtuse and finicky tools in Illustrator—it’s imprecise, buggy, and asks a lot of the user. There's a good chance your first experience with the hellgrid was accidentally enabling it, then struggling to find the menu command to hide it.
What you’ll learn
Whether you’re new to Illustrator or looking to sharpen your 3D drawing workflow, this guide breaks down the process with clear examples, practical tips, and warnings about the tool’s quirks so you can work confidently and avoid common pitfalls.
So yeah, the perspective grid… let’s take it for a spin!
Getting Started
Locate the Perspective Grid Tool (Shift+p) and accompanying Perspective Selection Tool (Shift+v) in the toolbar.
The Perspective Grid Tool (Shift+p) allows interaction with the grid planes, cell size, and other aspects of the grid without affecting the artwork.
The Perspective Selection Tool (Shift+v) allows interacting with shapes placed on the grid and keeps them in perspective when repositioning. This is the primary tool when working on illustrations.
Grid options are also found under View > Perspective Grid > One/Two/Three Point Perspective. Clicking the tool or enabling the grid from the menu will usually display it, including a plane switching widget at the top left. If nothing appears, click the icons a few more times, because—glitchy…
The grid can also be shown or hidden by selecting View > Perspective Grid > Hide/Show Grid (Shift+Ctrl+i or Shift+⌘+i).
Illustrator will default to the two-point perspective grid. The plane switching widget helps to select the active, working plane.

Adjust the perspective angle, planes, grids, and more
Perspective grid basics in Adobe Illustrator
To understand the basics, Adobe has a fantastic (and concise) overview of grid options and setting things up, including the various perspective types. To save me from rewriting the fundamentals here, check out How to draw artwork in perspective in Illustrator (adobe.com).

One, two, and three point perspective examples

One, two, and three point perspective examples
Working with objects, such as taking complex shapes and placing them into perspective, can be found here: Draw and modify objects on the perspective grid (adobe.com). It’s another short reference article; definitely worth your time.
Now that the basics have been covered, let’s got to work!
1. Reference
The house from Ponyo was chosen for this project because of its perspective-friendly boxy appearance and interesting balconies. Who doesn’t love a good balcony. Shouldn’t be that difficult to put it into two‑point perspective in Illustrator, can it?


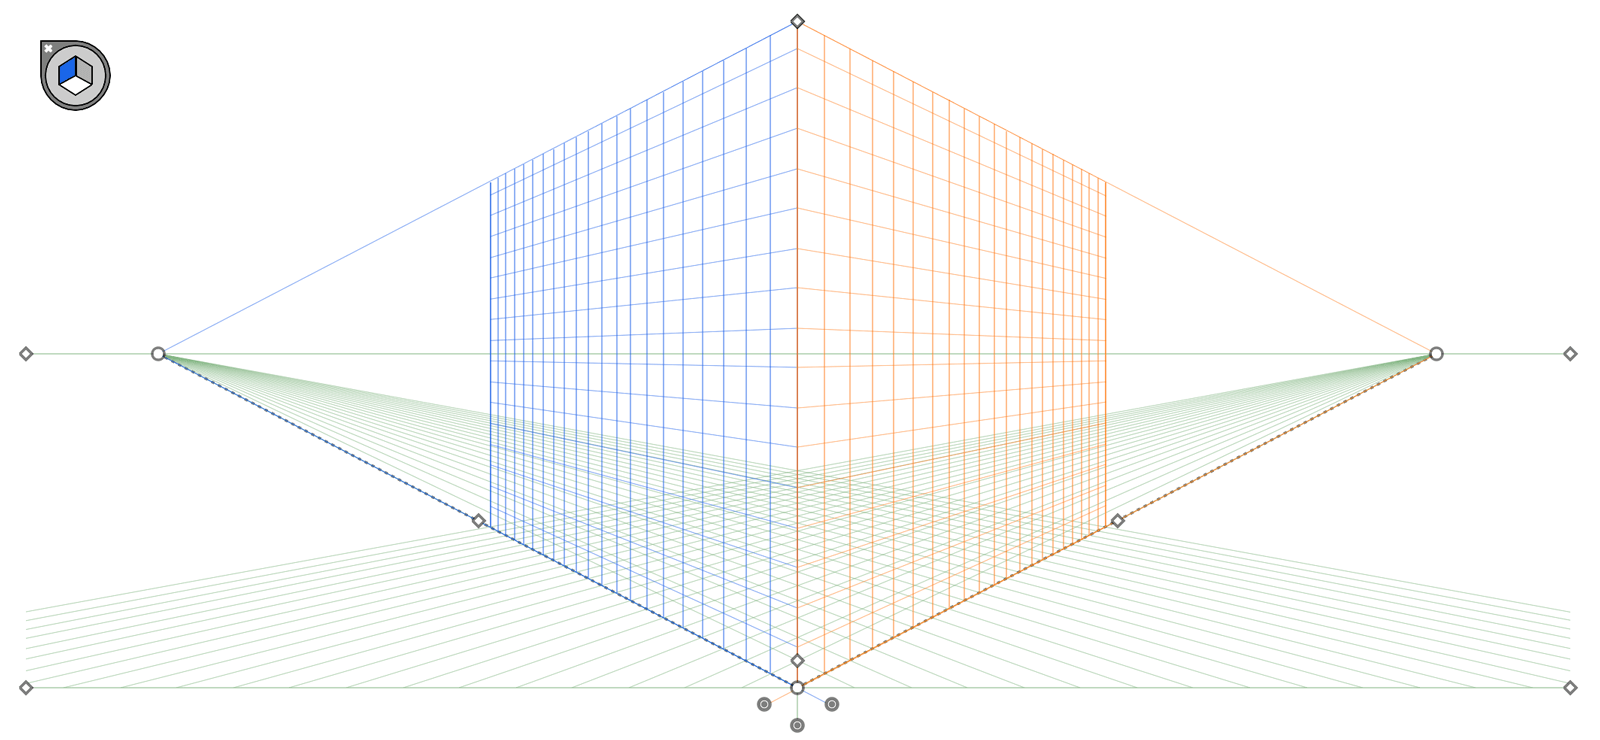
I’ll be using a two-point perspective with tight grid lines and slightly off-center rotation for my Ponyo house illustration.

Two point perspective grid used for Ponyo’s house
You mustn’t move the grid’s vanishing points or ground level after you’ve begun building; nothing will move with it and additional graphics won’t match the perspective. Keep in mind only one perspective grid can be used per document.
2. Palette
This house uses a 5-color palette—Ghibli loves their gold and salmon colors.

3. General Construction
When starting a perspective illustration, it’s helpful to create a flat version of the object, then attach those pieces to the perspective grid using the perspective selection tool (Shift+v) as seen in this tooltip:

Illustrator’s grid overlay View > Show Grid (CTRL+‘ or ⌘+’) is helpful for measuring flat elements and approximating relative sizes. This will help with consistency when bringing everything into perspective.
Define large areas first
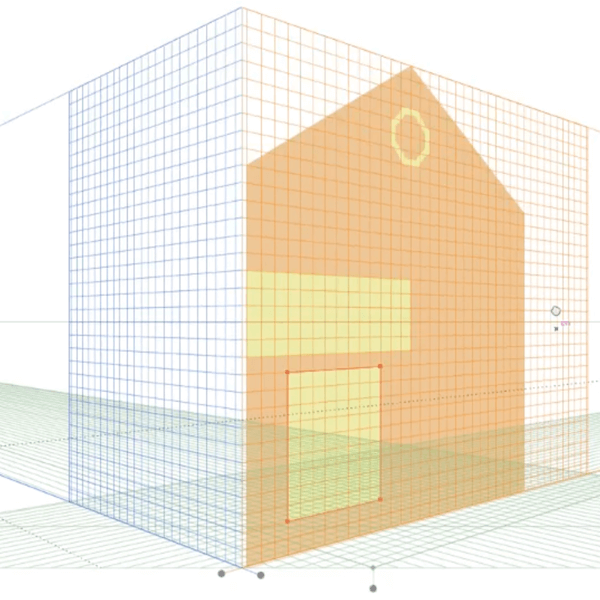
The Ponyo house main front wall was laid out first, using grid blocks as a basic unit of measurement. Choose a grid size that supports your smallest details—for example, a 1×1 block for flower pots or 2×3 for small windows—and enable snap to grid with View > Perspective Grid > Snap to Grid.
Shown here is the primary side of the house snapped into perspective with the window and balcony footprint laid out.
Various colored shapes were then added to designate protruding areas (balconies, windows, etc.).

Step 1 - Flat side laid out on grid

Step 2 - Apply side to perspective
Step 3 - Designate areas that will protrude

Step 4 - Continue building protrusion footprint
The octagonal roof vent was the first piece created and used as a reference for the rest of the house. Its 4×4 grid was useful for measuring the spacing and size of most everything else around it.
There’s plenty of room for freeform design, but you don’t want too loose of a grid (hard to snap elements), or too tight of a grid (hard to maintain consistency).
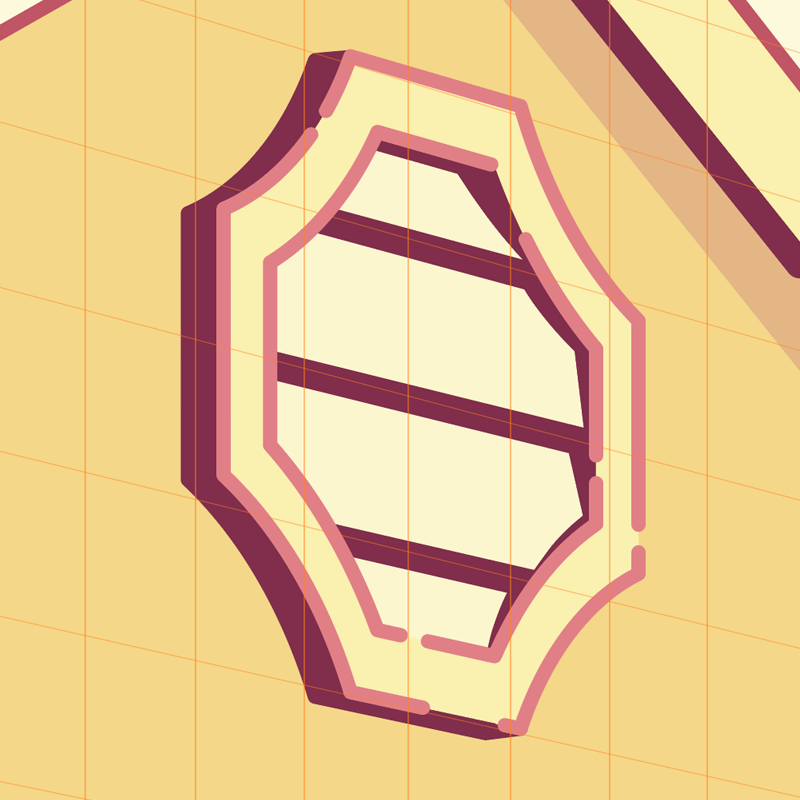
4×4 roof vent with inside rounded corners

4×4 small curved window

6×4.5 side window
Work on extruded structures next
Once the wall is complete, begin extruding the balconies and other pieces using the perspective selection tool. Select an element on the active plane (like the balcony below) and hold Alt + Shift and drag the plane. This creates a copy of that element and swings the plane to a new location. By holding Shift, the shape will maintain grid snapping and perspective.

To complete the other face, change the active perspective plane using the widget and draw the missing face as a basic rectangle shape. Smart guides and snapping should keep everything tidy. As long as the grid is visible, any new shapes will be applied to the active perspective plane, seen here:

4. Details
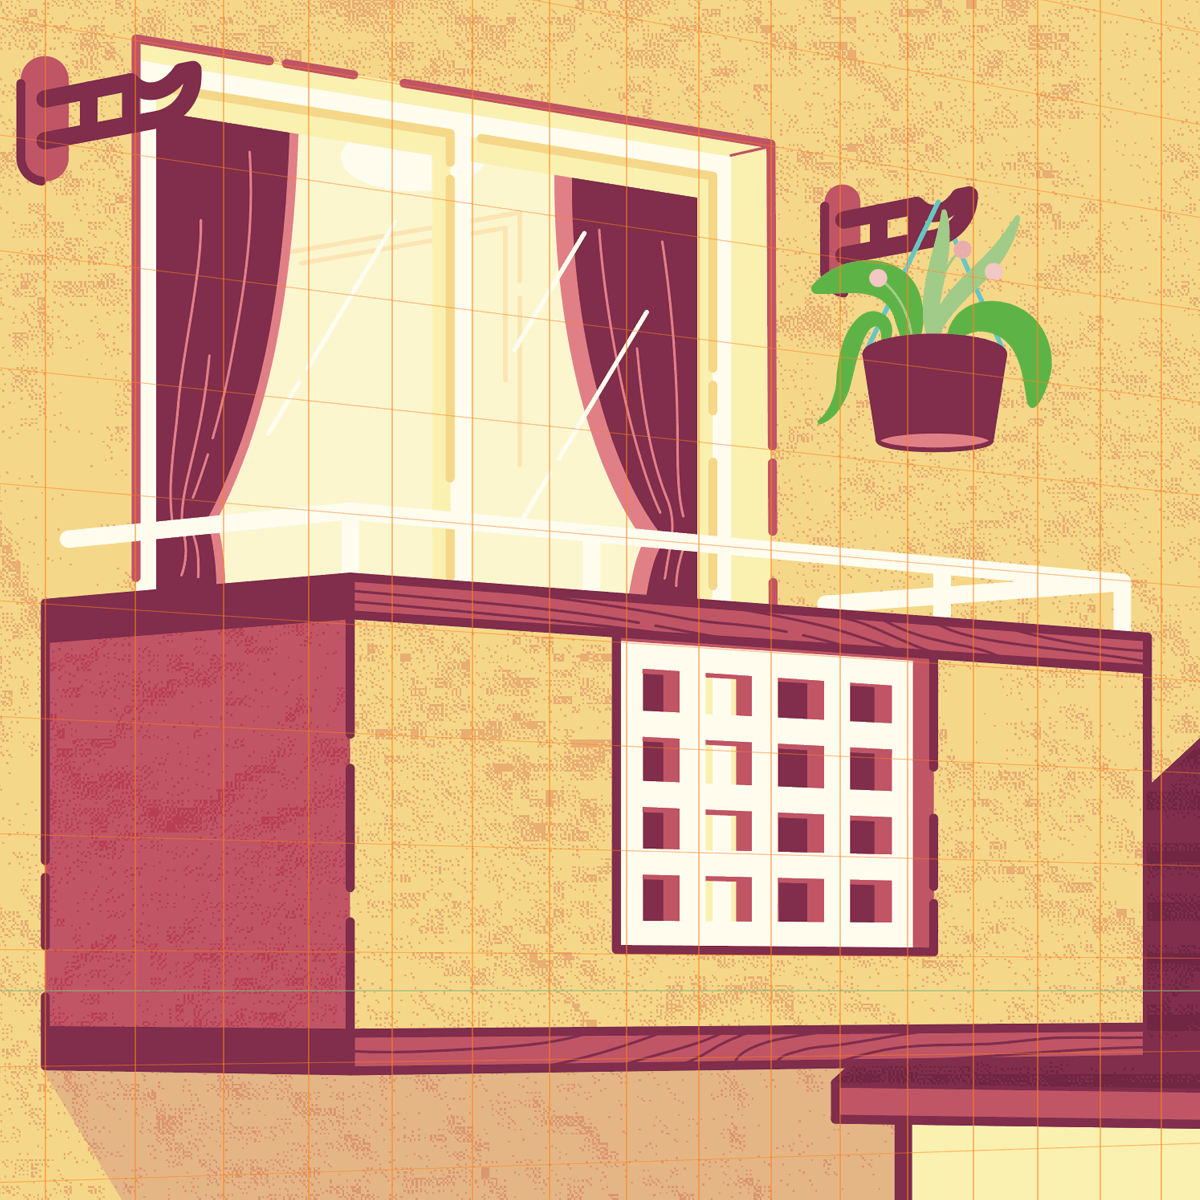
When all the large areas are completed, have a pass at refining everything by adding little insets, borders, line-work, and other details.
I edged most surfaces with a dashed line for that technical drawing look and made some freeform plants.
The roof itself was manually placed using the existing walls as guides—not everything needs to use the perspective tool. If it’s easier to grab the pen tool to complete the missing pieces, have at it.

5. Backgrounds and texturing
Textures and backgrounds are added last. This uses the same texturing process from my Spirited Away bath house and the house from My Neighbor Totoro, with some additional lightweight gradients and blending modes for the ground, sky, and water.


Bugs
There is a critical bug with the perspective tool that has existed for years, YEARS, with no fix in sight—the vanishing plane glitch. It’s irreversible and cannot be fixed by saving and reloading.
The perspective grid vanishing plane bug happens way too often, always when pressing Shift and adjusting objects and planes. If you save and quit after the plane has vanished, adios muchacho, it’s permanent.
If you notice a plane has vanished, undo until it returns; hopefully you caught it in time. Be sure to save your grid as a preset to easily load it back up in case bad things happen with View > Perspective Grid > Save Grid as Preset. If a plane vanishes, reload your custom perspective grid and continue.
Wrapping Up
It’s important to remember Illustrator’s perspective grid is a helpful tool, but you never need to use it as intended—nothing is stopping you from taking a screenshot of it and pasting the grid into photoshop as a custom guides overlay! Actually, that might be a better way to use it because it’s wack in Illustrator.
For the entire process (and lots of struggling) check out the Ponyo house perspective grid videos on Twitch. Thanks for reading!

More architecture from your dreams


An illustrated rendition of Satsuki and Mei's house from My Neighbor Totoro printed on a heavy museum-quality matte paper.
• Paper thickness: 10.3 mil
• Paper weight: 189 g/m²
• Opacity: 94%
• ISO brightness: 104%
• Paper is sourced from Japan


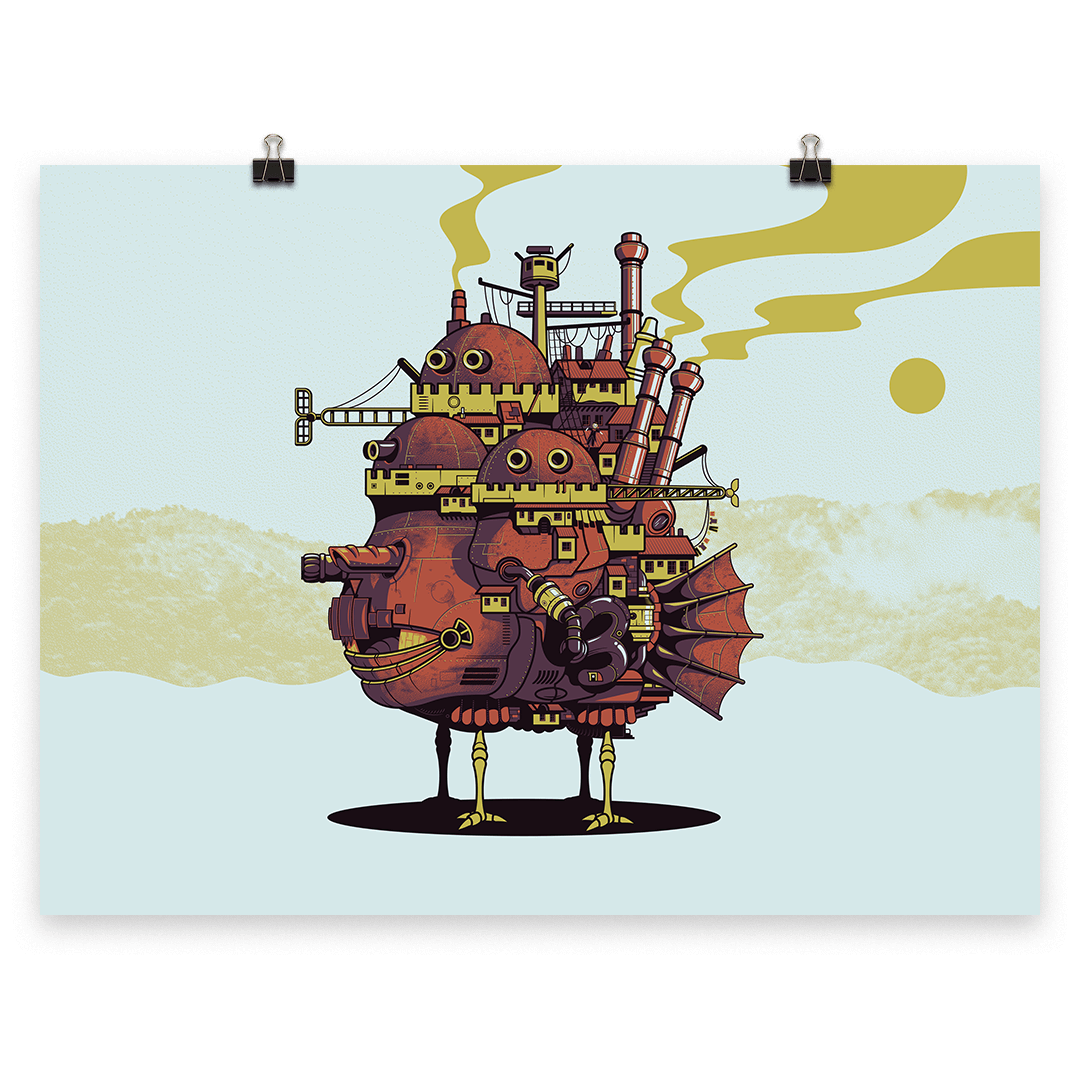
This poster is equally at home in your potion room or living room — may all your bacon burn! A vibrant, limited palette illustration from my Howl's Moving Castle animation tutorial. This museum-quality poster is printed on thick matte paper.
• Paper thickness: 10.3 mil
• Paper weight: 189 g/m²
• Opacity: 94%
• ISO brightness: 104%
• Paper is sourced from Japan