Illustrator 3D Tools & Tips
Overview: A practical guide to Adobe Illustrator’s 3D tools and tips to help you create cleaner, more realistic 3D artwork with less frustration.
Adobe Illustrator is almost never the last step in a 3D project, but it can certainly be the first. Its revamped 3D tools have been redesigned to focus on simplicity and quality (and slowness 🥴) and allow designers to dip their toes into the realm of 3D compositions. It’s easier than ever to create lightweight 3D objects, inflated shapes, and stylized renders without leaving your vector workflow.
Here are some observations and tips when working on a lightweight 3D project in Illustrator, with a touch of Adobe Dimension to up the ante.
What you’ll learn
In this tutorial, we’ll explore how the new 3D panel compares to the classic tools, how to use Inflate for dimensional artwork, exporting, raster options, and how to refine your models in Adobe Dimension for higher‑quality lighting and materials.
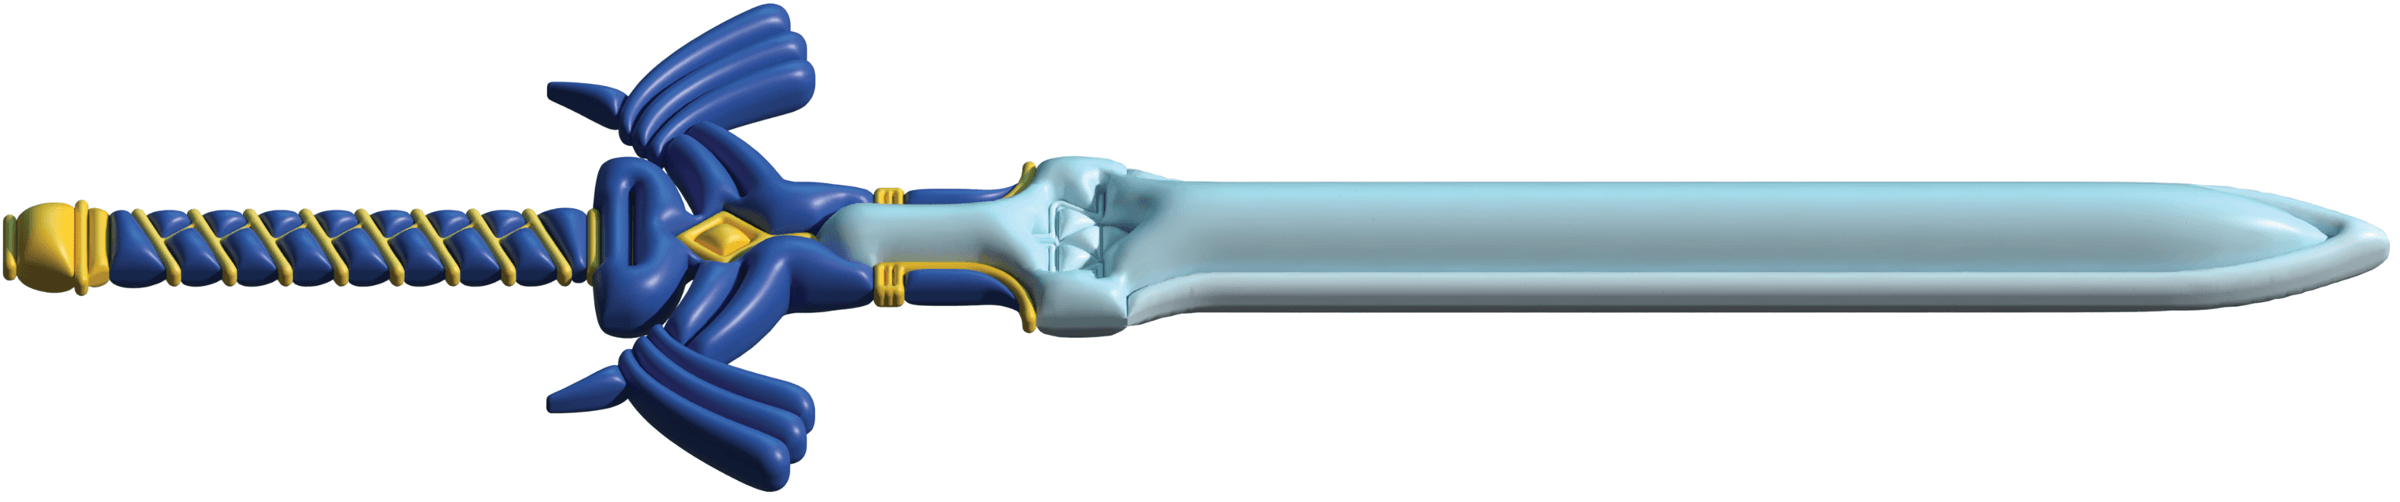
And hey, listen! we’ll walk through the entire process by recreating the iconic Master Sword from Zelda using Illustrator’s modern 3D features 🗡️.

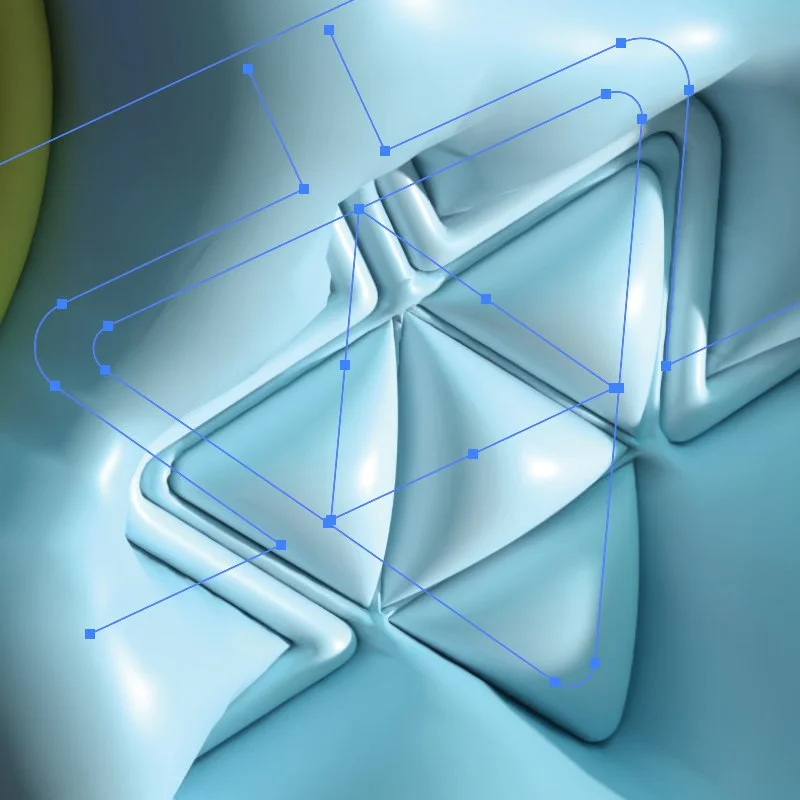
Flat vector art for the Master Sword uses a combination of filled shapes and lines.
A quick comparison of classic 3D vs. new
If you’re coming from the classic 3D tools in Illustrator (you’ve tried them before, right?) the new tools are more comprehensive and have a greater degree of control.
A few dozen materials (textures) from the Adobe Substance 3D suite have been added which dramatically expand the realism and flexibility of Illustrator’s 3D output. Other valuable additions include render quality controls, useful presets, ray tracing, and additional 3D export options.
The Classic Tools
Illustrator’s classic tools require a commitment to one of three kinds of 3D dark magic: rotate, revolve, and extrude. Lighting is fidgety, textures & mapping art is merciless, and dragging the 3D cube is imprecise—and don’t even talk about the 1º increments that never update the preview. Learn more about the 3D features over at Adobe.

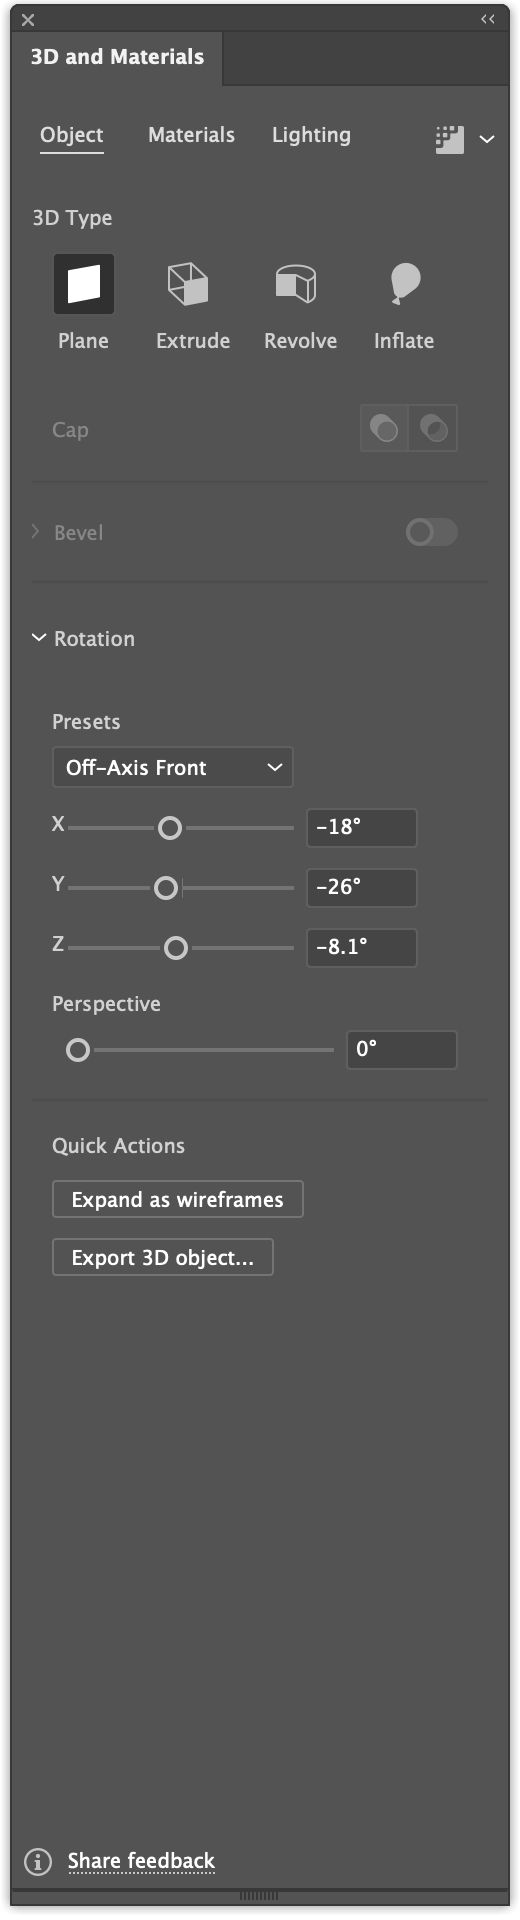
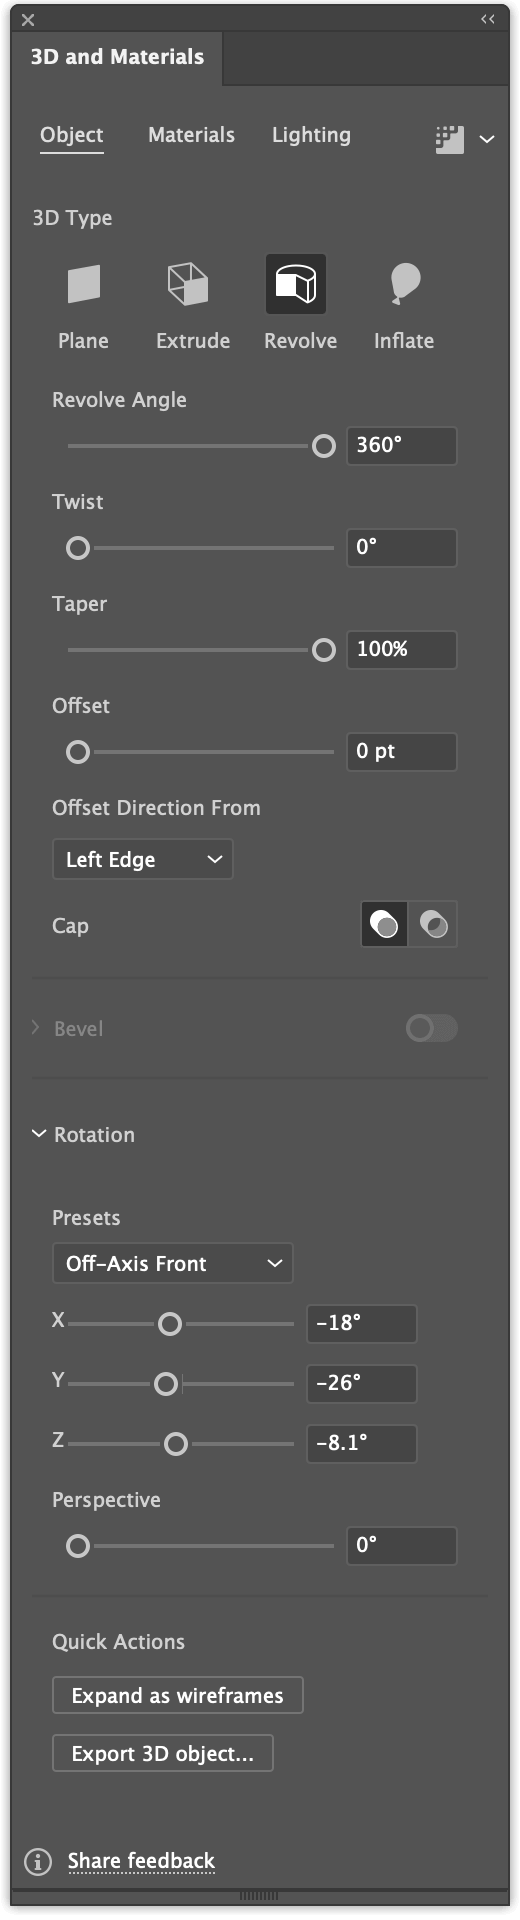
The New 3D Tool Panels
The redesigned 3D panel consolidates all 3D modes into a single, streamlined interface. This new hotness has tabbed dividers and quick selectors for every 3D mode. It’s easy to toggle between 3D styles and most classic features have found a new home here. Notable improvements include Substance materials, 3D export options, inflate, and quality & ray tracing settings.


Deflate those expectations
The new tools are certainly an organizational and performance improvement, but if you were hoping for vastly improved render times you might be sad.
Anything that took forever to render in classic 3D will be about the same (or slower with material textures). Feel like moving a 3D object? Want to nudge a light? Go grab a sandwich while it renders because you’ll have the time.
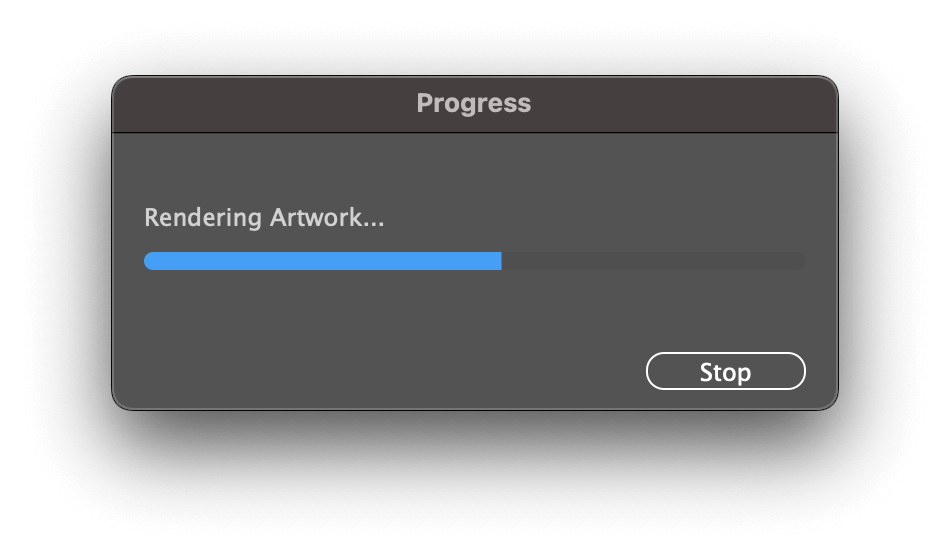
If you’ve gotten used to this progress bar in classic 3D…

…you’ll feel right at home with the new 3D progress bar.
Watch out for stability issues
There are still some stability issues like running out of memory and crashes. Though nothing tops this error when extruding too many shapes — Illustrator just… can’t. Who doesn’t love a good error?

(╯°□°)╯︵ ┻━┻
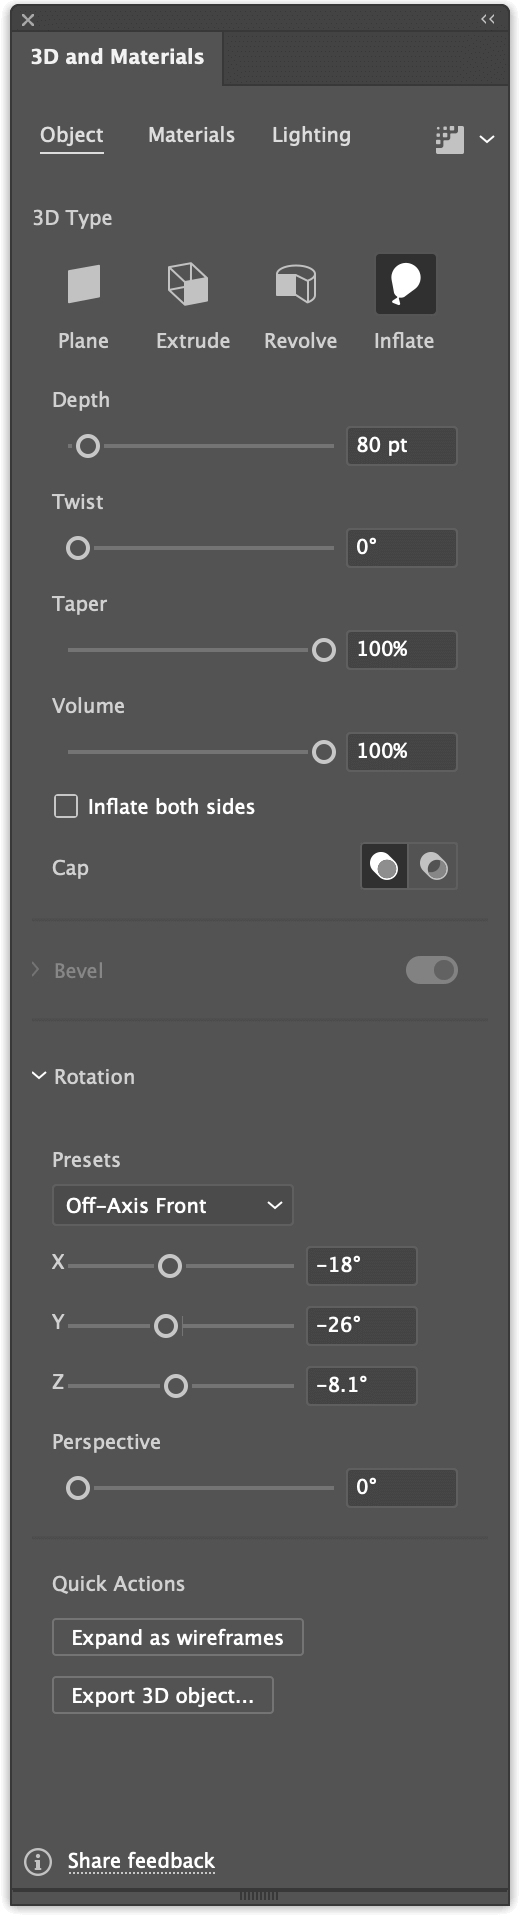
Inflate those expectations; let’s begin
This article will focus mainly on the new Inflate 3D object. At the time of writing, the large letterform that graced the Illustrator splash screen is a simple inflated object and these ballons exploded on the scene everywhere.
Here’s a comparison of the original and my first attempt at recreating it, including the settings (it uses the default plastic materials).
The whole series by Daniel Escudeiro is pretty great and uses Extrude, Revolve, and Inflate
Actually that was a lie… it was my second attempt. The following was my first attempt.
Why slight color variations matter for Inflate
If the entire object is the same color, 3D inflation will treat same-color areas as a single large element and you’ll have a lovely pillow. Small differences in color are needed to create puckers, even a .001% change is enough. This also works with strokes as seen below.

If the colors are the same everything will combine into one inflated shape.
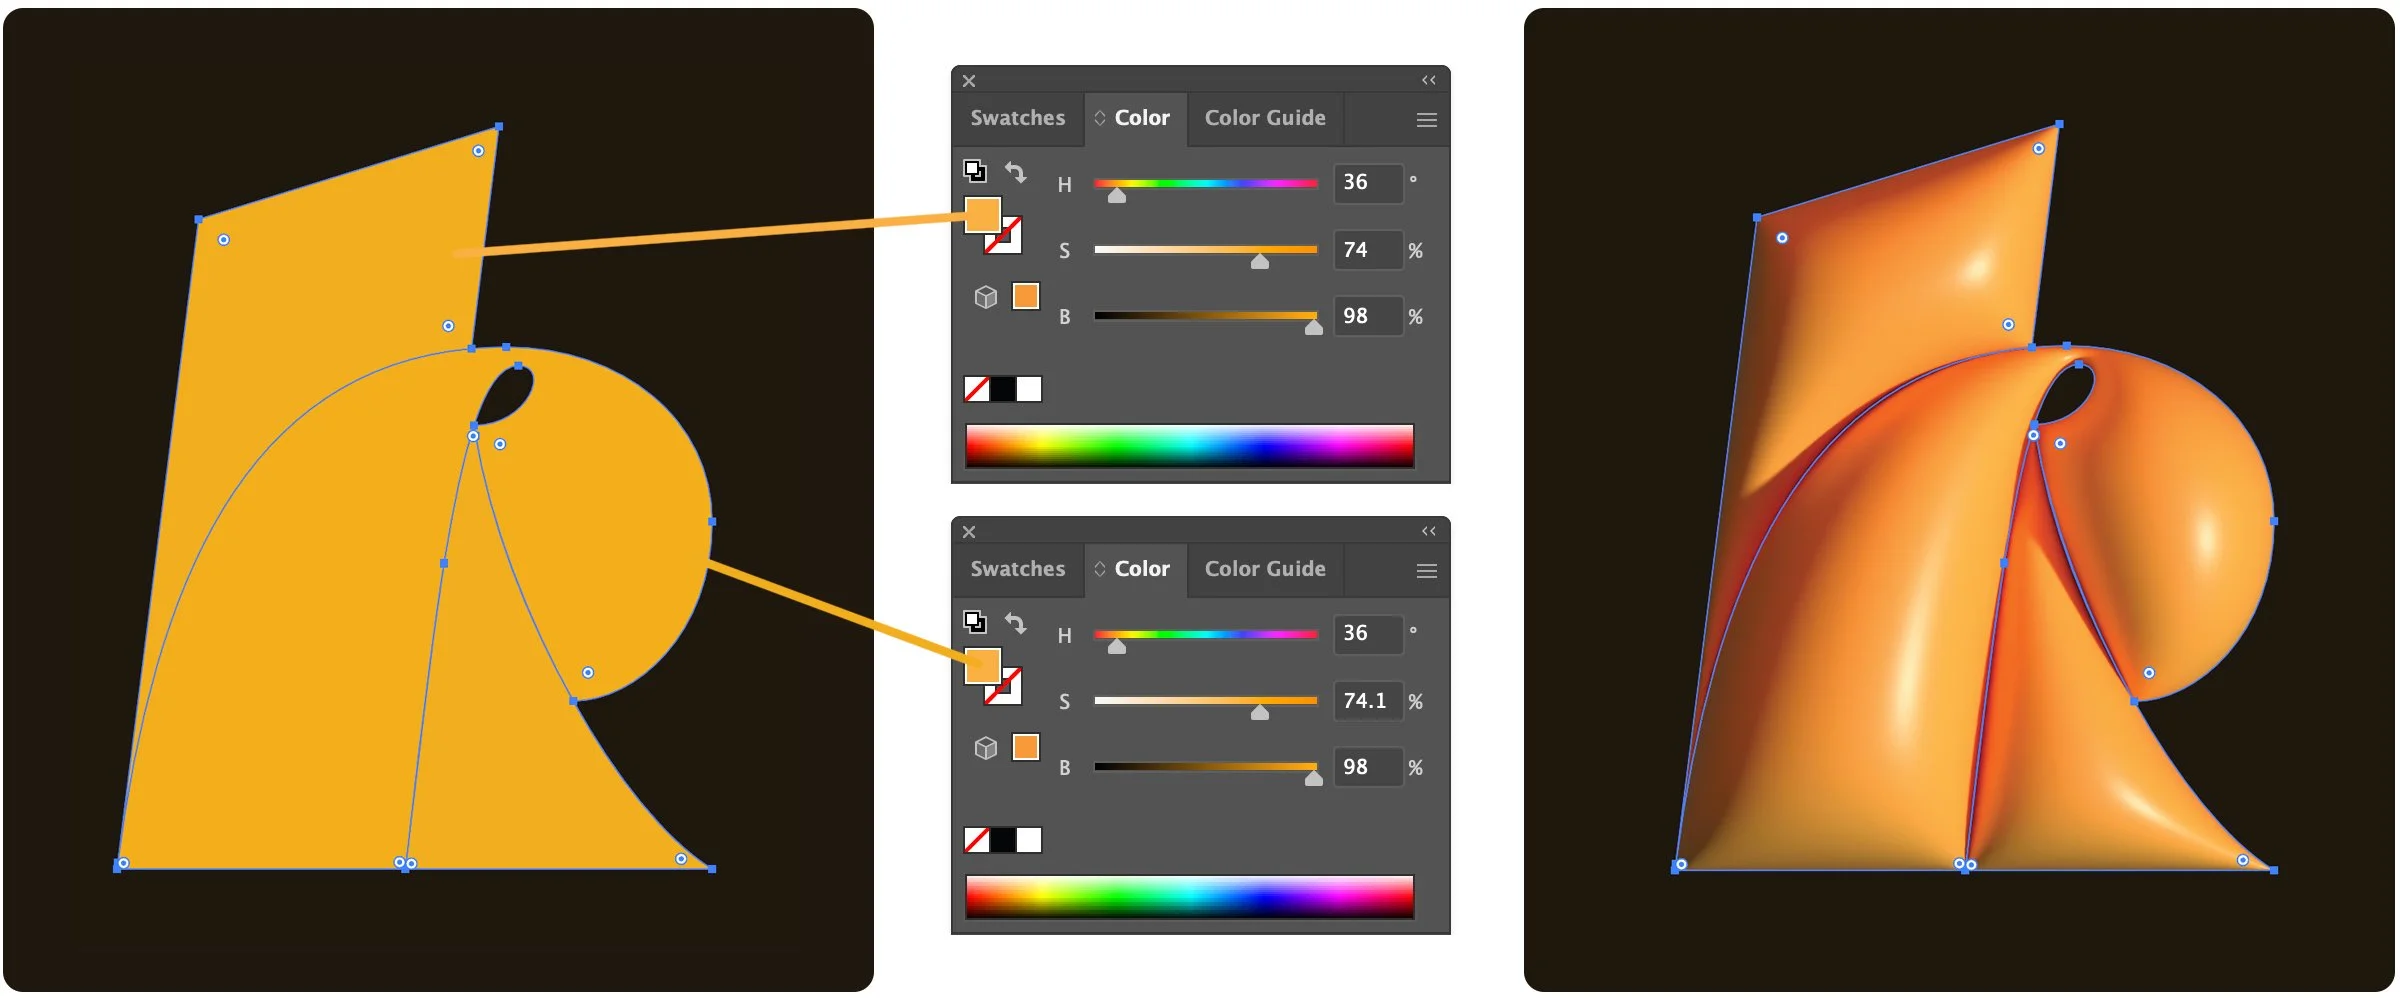
Use slightly different colors to force folds and puckers.
Keep neighboring colors slightly different to enforce folds and puckers using shapes and strokes.
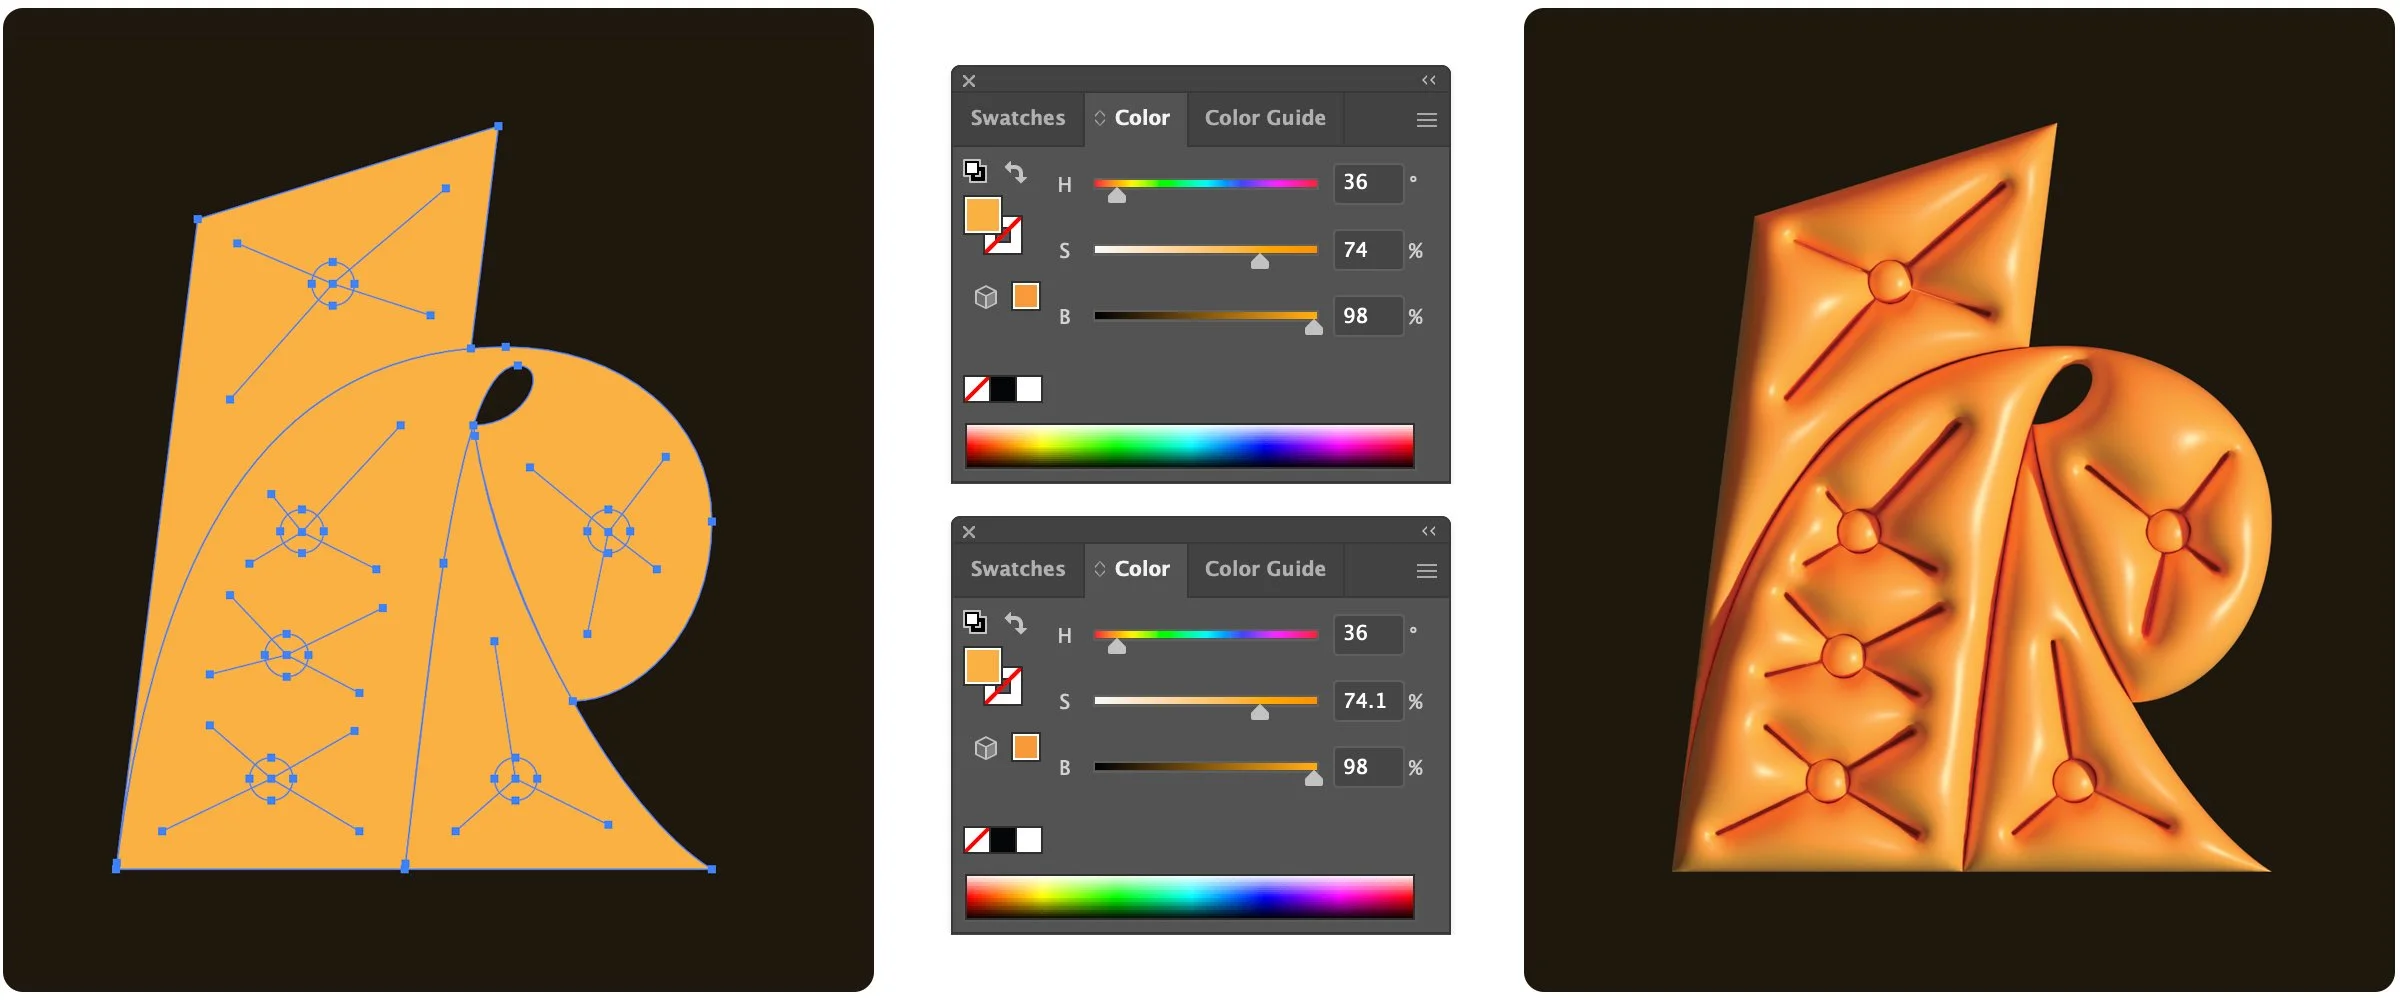
Careful with tight corners and edges
If edges or corners aren’t 100% perfectly touching adjacent edges, you might get exploding extrusions on an edge or two, usually after rotating or adjusting a shape—you’ll know it when you see it (below). Use Smart Guides to mitigate this, but if it happens to you, overlap your edges a little more so there’s no micro gaps and you should be set.
It’s dangerous to go alone, take this
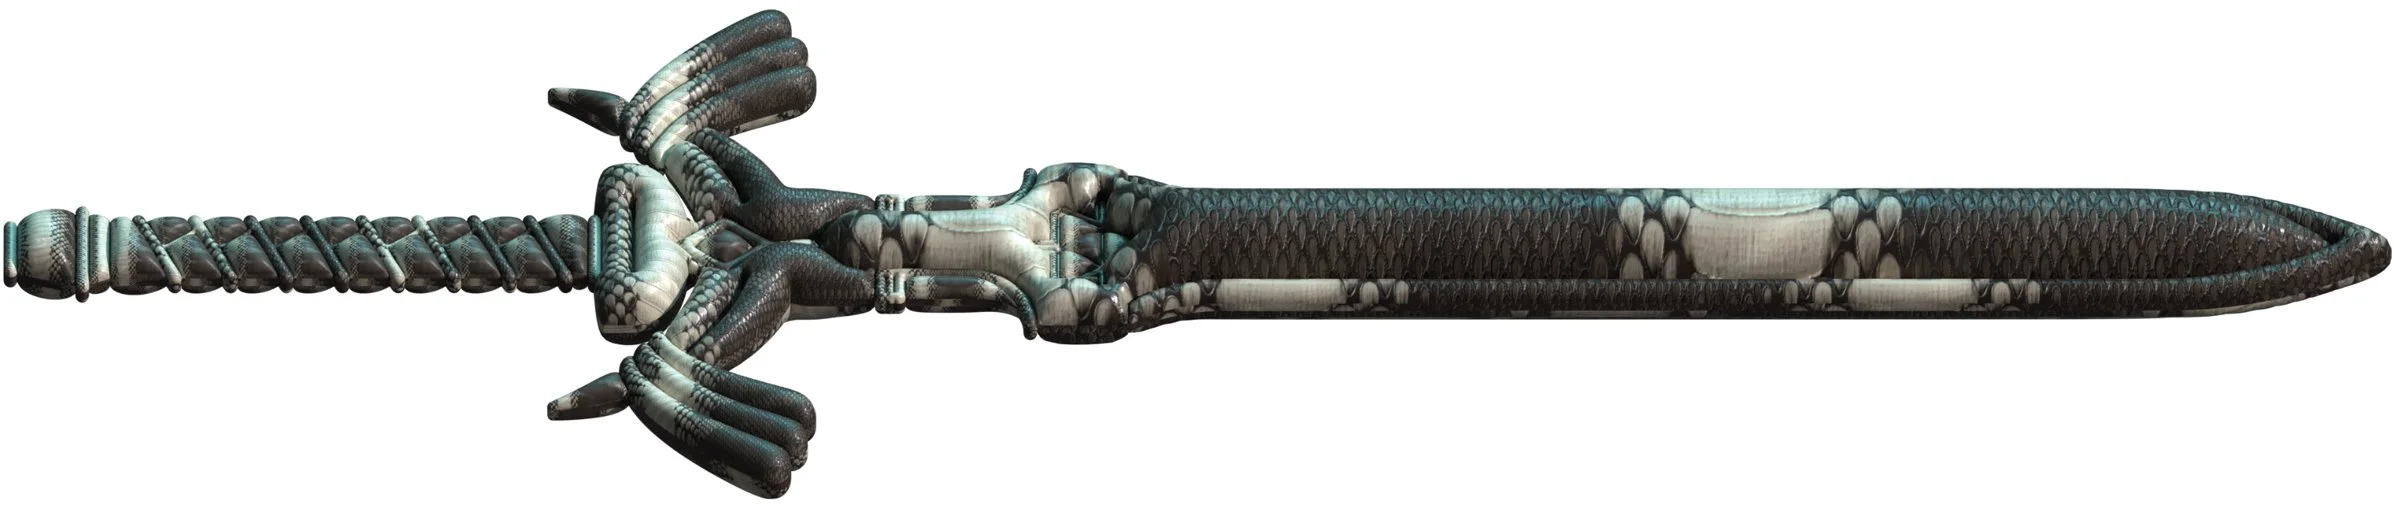
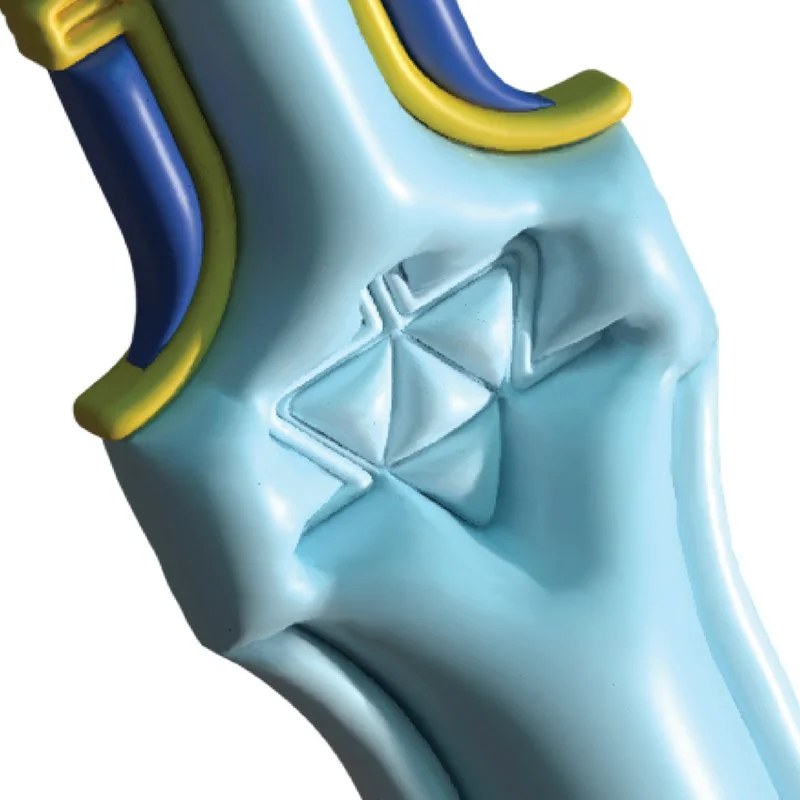
Here’s my Master Sword line art with the 3D Inflate effect applied using a depth (thickness) of 4pt and inflate both sides enabled.
Pro tip for color use
To keep the original colors default base material must be used; this material is just like the classic 3D surface. Roughness and metallic sliders are available, but most things will wind up looking like balloons regardless. You basically just get to decide if you want a vinyl or metallic mylar balloon.

Textures and Materials
We’re living in a material world and Adobe Illustrator is now a material girl. The addition of Adobe Substance Materials is a nice little bonus. These Substance materials allow for realistic surface qualities such as roughness, creases, metallic finishes, and pattern density.
Each material comes with various settings depending on its complexity: roughness, crinkles, creases, luminosity, hue shifting, saturation, ambient occlusion, pattern density, finish filters, repeats, and a buttload more.
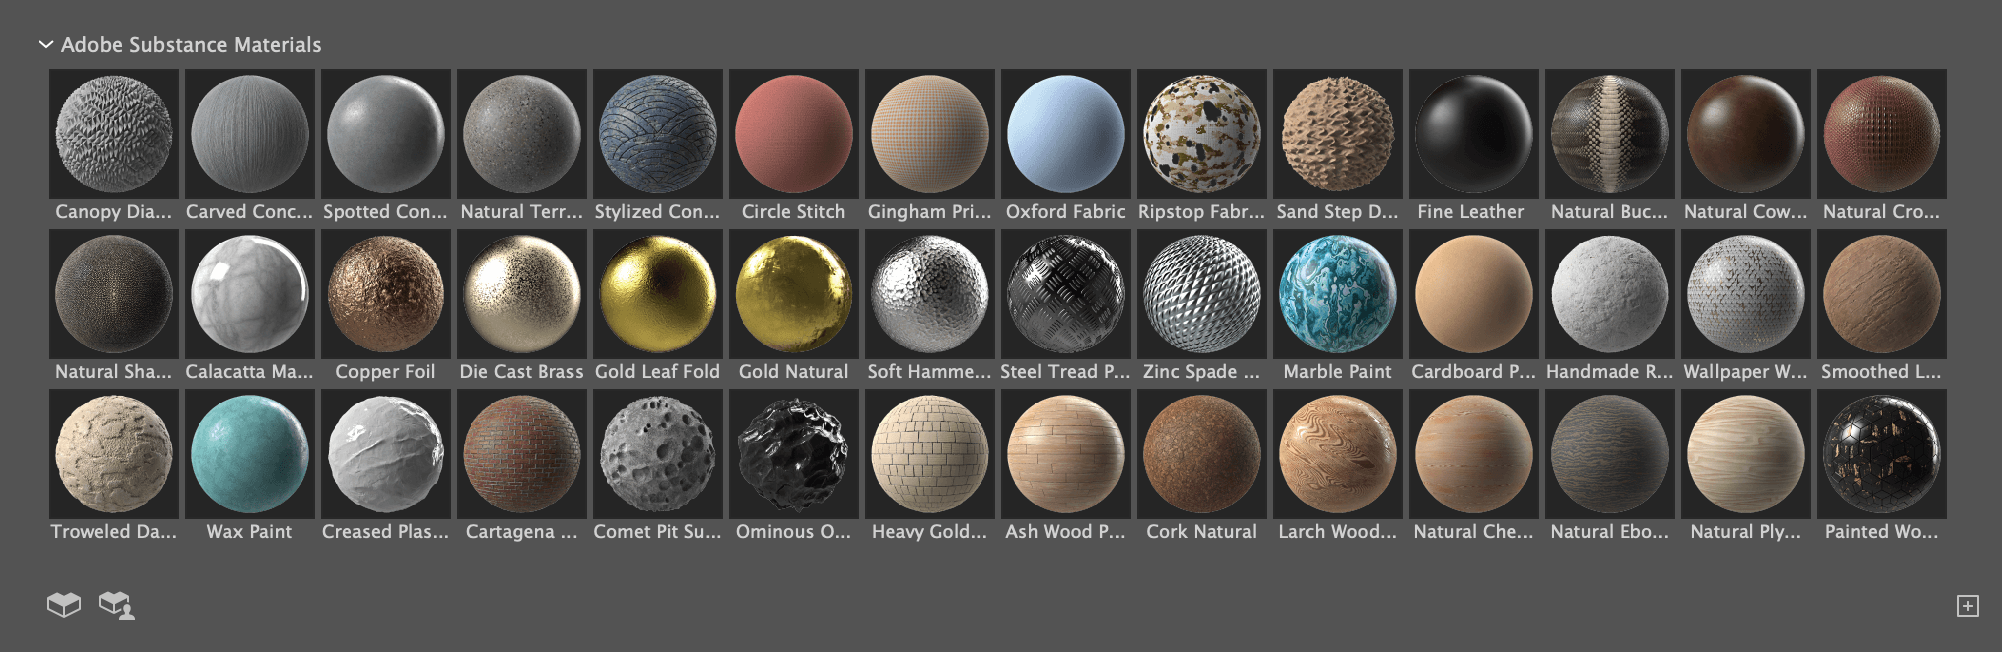
Default Substance materials in Adobe Illustrator.
Additional Material Assets
There are some pretty fantastic user created textures which can be downloaded free of charge from the Adobe Substance Community Assets website.
Even more professional materials are available on a paid Adobe Substance account, though it’s prohibitively expensive for a casual Illustrator user ($50/mo. additional). You wouldn’t really be using Illustrator for 3D at that point.
There are even more materials on the Adobe Stock Website. The textures found here are meant for Dimension (I think all of them?) and won’t work in Illustrator despite appearing as “available” in your Creative Cloud library—you’ll want to stick with the Substance materials above.
Material Examples
Here’s the included Gold Natural material… it has a modest 25 adjustment options. So shiny!


And the Natural Buccata Snake Leather material, with plenty of options to customize:

Multiple materials cannot be used together
Materials will override any colors on the object, and cannot be used in combination with each other, i.e. it’s not possible to assign a metal blade and leather grip on the same 3D object… unless you use Adobe Dimension; keep reading. 😉
Mapping art and graphic decals
To be thorough, I’ll briefly mention the Map Art feature.
The classic 3D ability to map art onto objects is a somewhat clunky and imprecise (but not entirely terrible) way to create solid product mockups, hollow vector wraps, and other combination shape and contour details. It lacks smart guides and snapping, requires some symbol wizardy, and is a frustrating endeavor trying to match patterns across discrete surfaces.
Classic 3D Map Art tool.
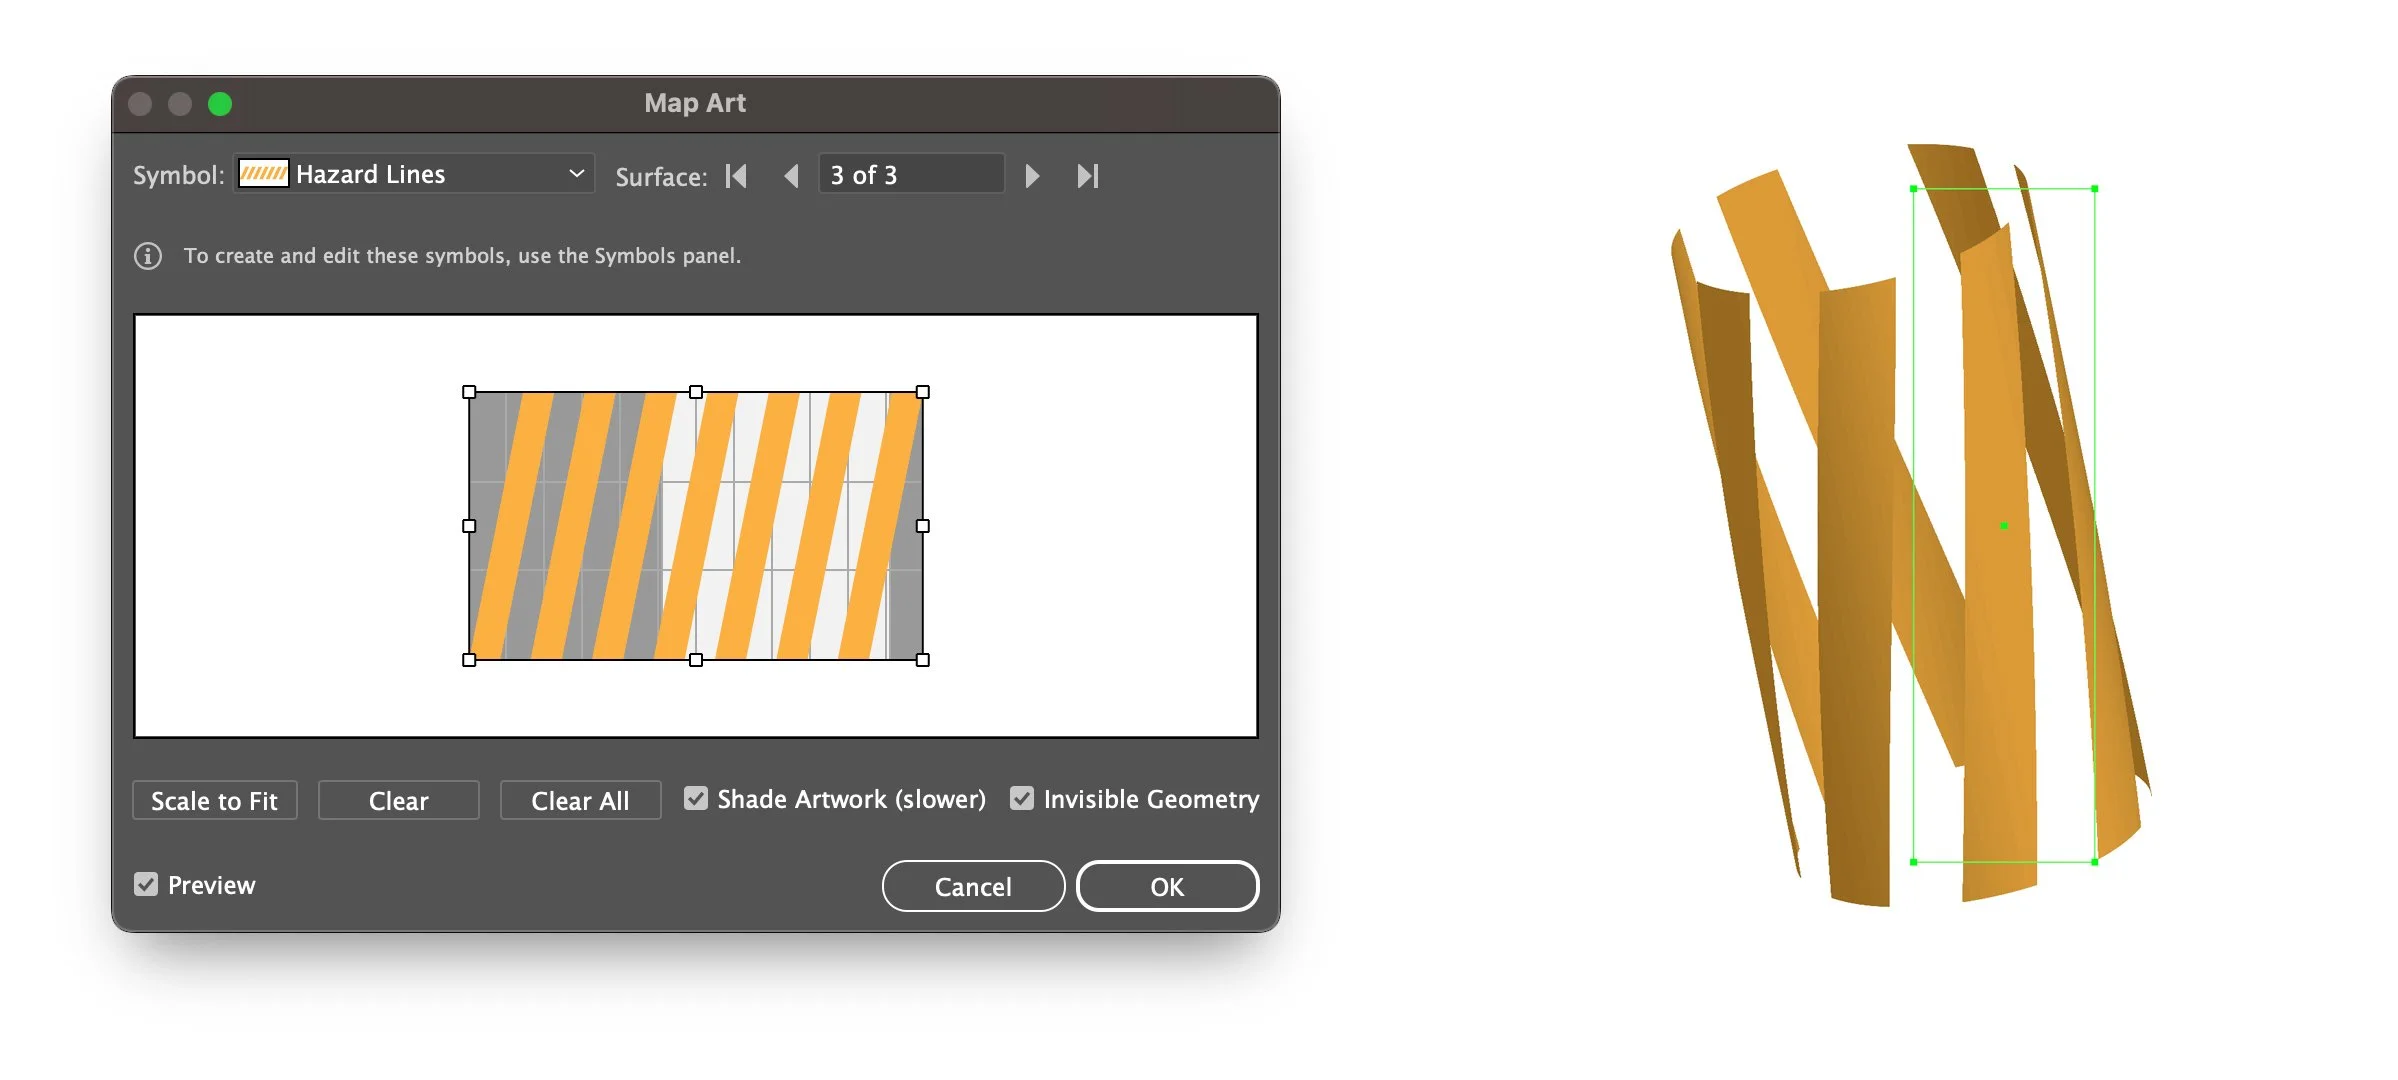
Unfortunately, the new Map Art workflow is significantly less usable than the classic version. The Map Art feature (now called Materials > Graphics) is a complete dumpster fire of usability.
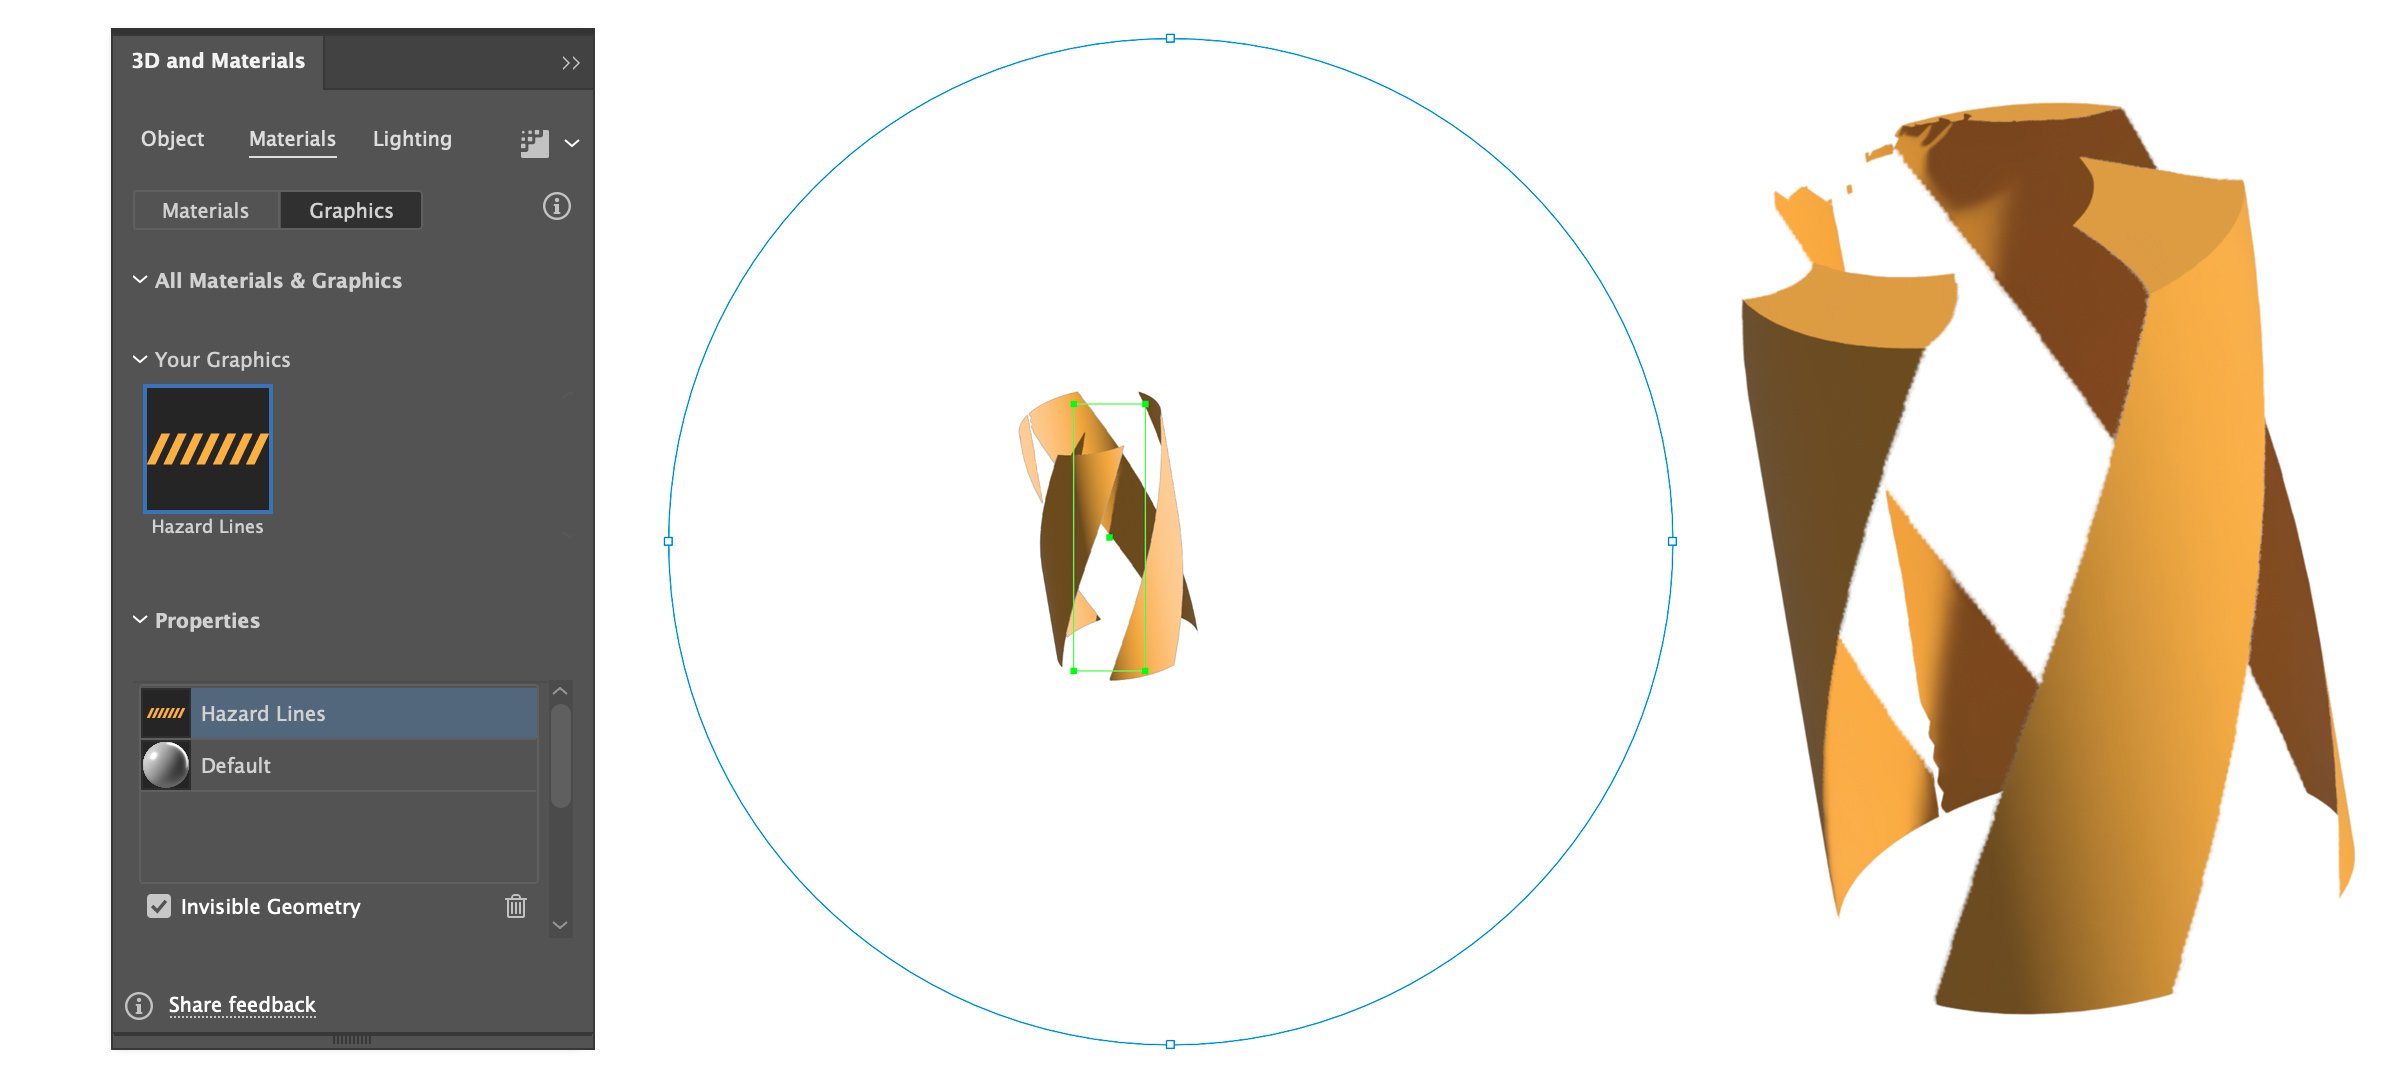
The new Map Art tool is absolute trash
Given the same 3D object and symbol above [inhale deeply], positioning and sizing must now be done in real time by dragging a very large zero-cursor-feedback circle around the object while everything continually freezes to render and all the pattern edges regularly vanish because there is no indication of the actual pattern boundaries and nothing snaps and the symbol spans all faces continually until it runs out unless you scale or rotate it to hopefully fit better but sometimes the entire symbol simply vanishes when it’s no longer touching a surface but how would you even know because you can’t see most of it and it’s just quicker to start over each time and hope for the best and I don’t even want to talk about this shit any more because it’s a hot mess and I can’t be convinced otherwise.
Please just use the classic Map Art tool.
Lighting
Right, so, the lighting is great! Multiple light sources have always been possible and many of the features are the same, but colored lights have been added to the tool set. Colored lights help create mood, depth, and stylized highlights that are difficult to achieve with default white lighting.
The 3D examples here all use colored lights as an accent fill. The Master Sword has a teal highlight and the splash screen letterform fills its shadows with a warm orange light.

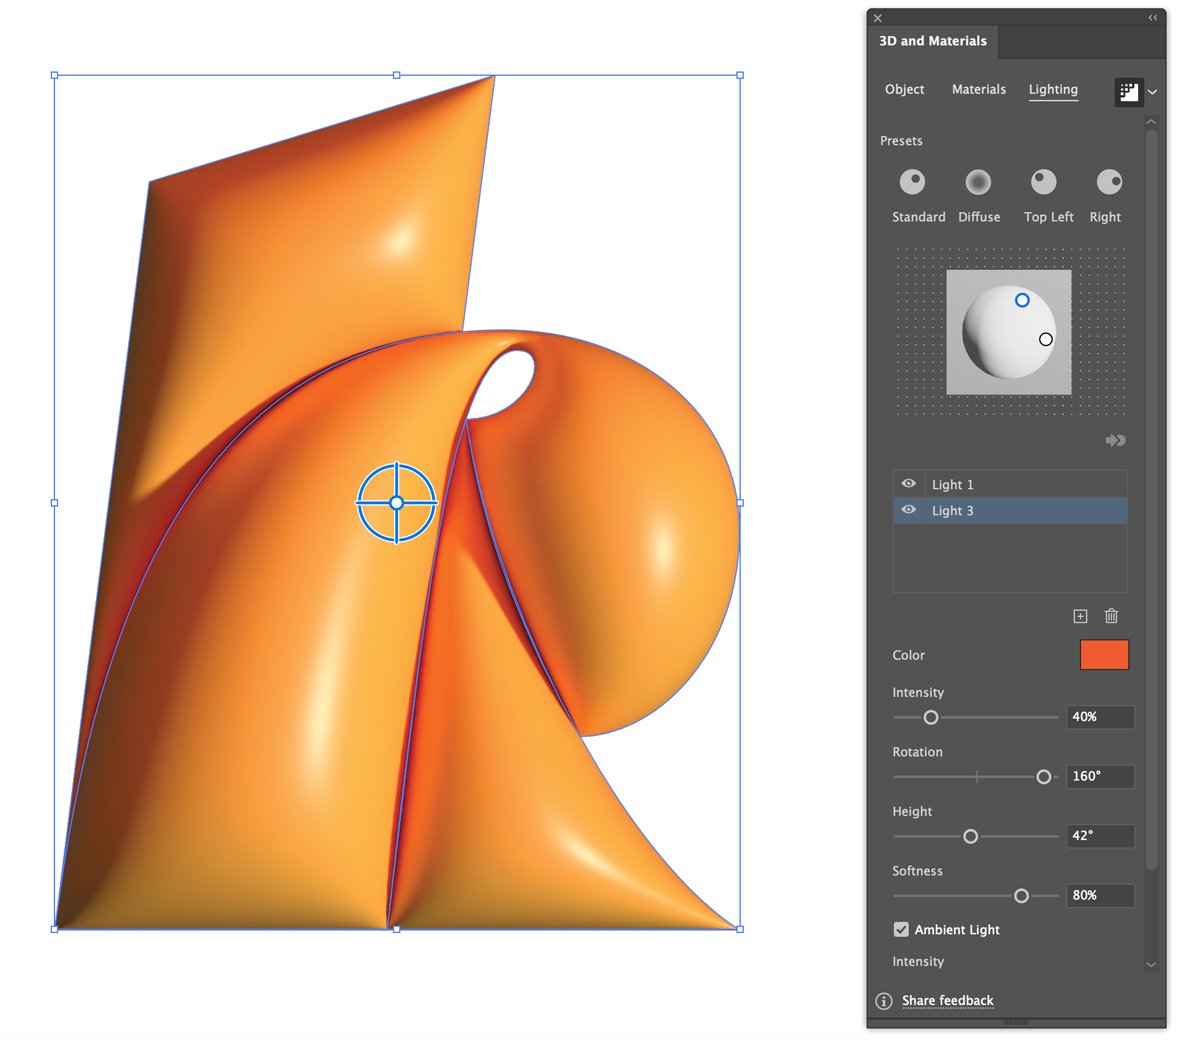
be warned, Rendering takes time
Lighting, at least for me, is the part that takes the longest to fine tune. Every adjustment requires a full render cycle to update. With large objects and detailed lights, you’ll be nudging and tweaking all night long.
One helpful tip to work more efficiently is to leave ray tracing off, adjust your lighting in low res until it seems right, then turn the ray tracing back on when you’re ready. You’ll find the option at the top of the 3D panel:

Ray tracing toggle.
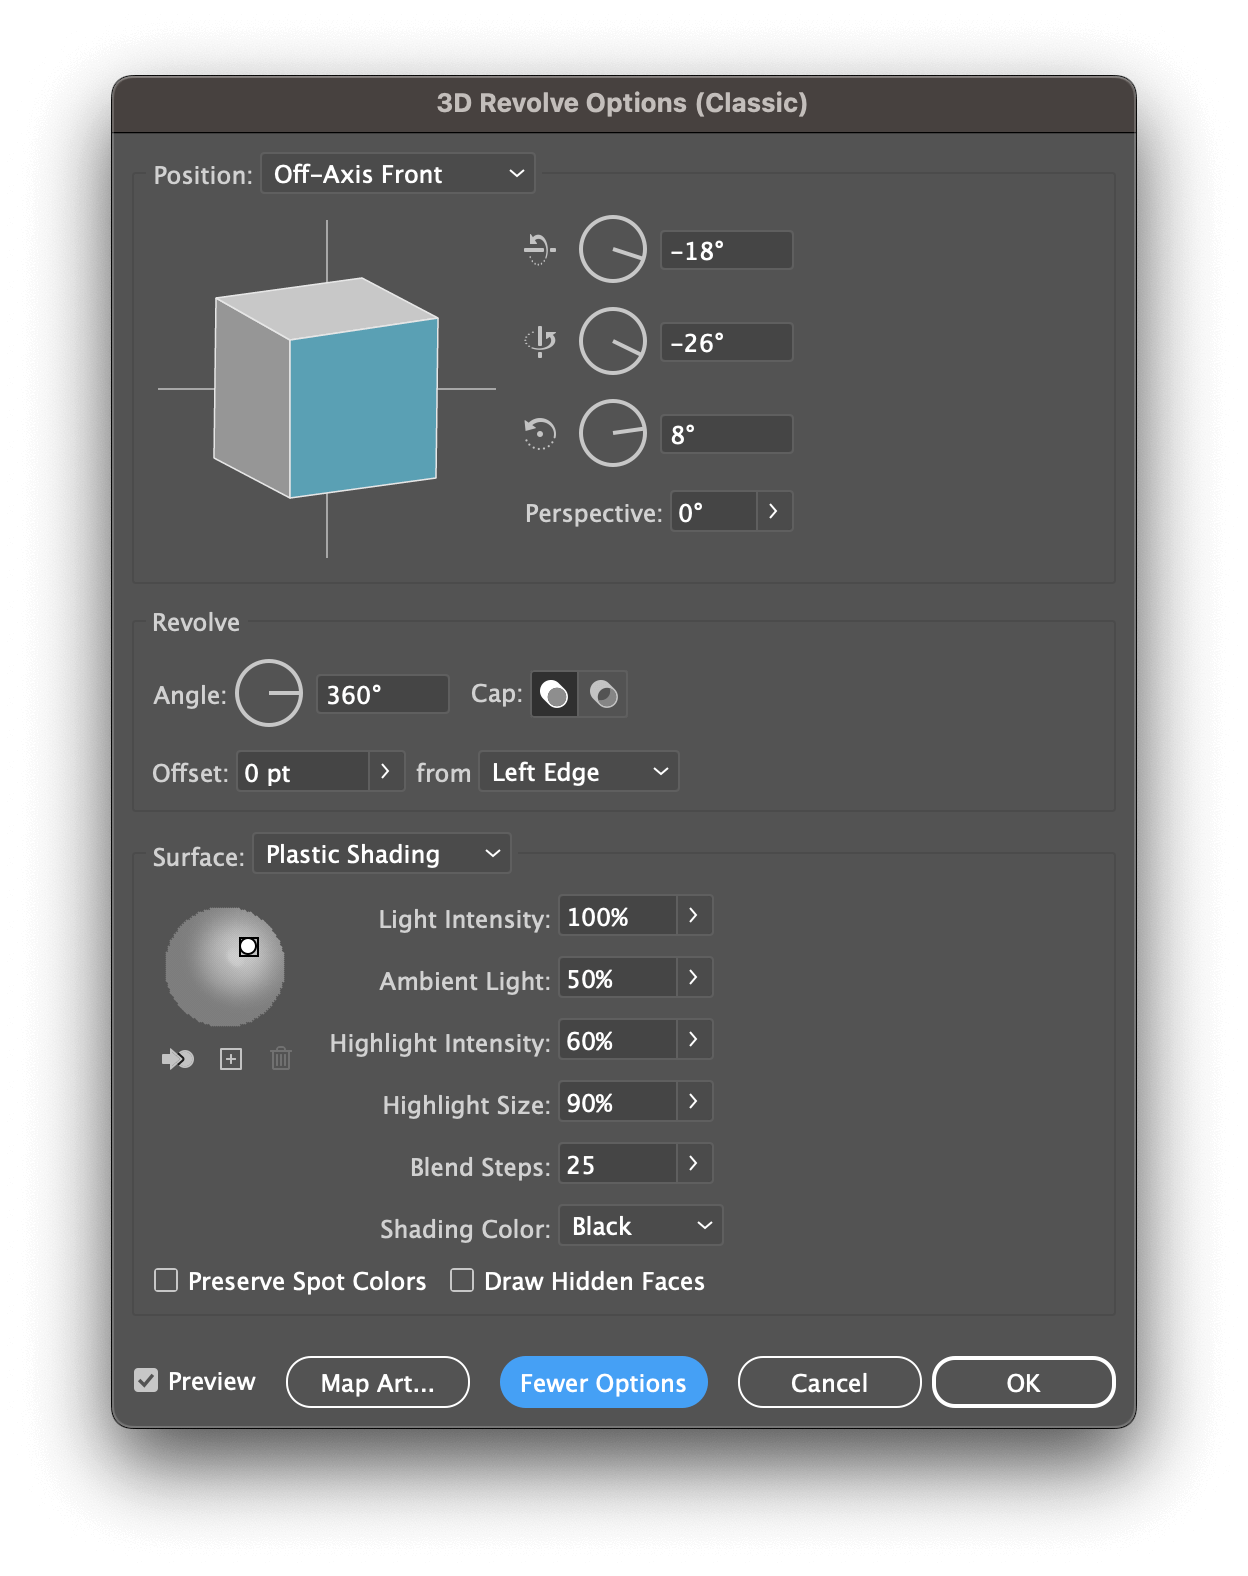
Classic 3D Cel Shading
Illustrator’s new 3D tools have largely replaced the classic 3D kit, but this classic tool is still useful: Surface > Plastic Shading and Blend Steps > X. The ability to limit the blend steps to achieve a toon or cel shaded look has been removed in favor of actual plastic materials and realistic lights, which can’t easily achieve the same look.
Grid of squares to be extruded.
Classic 3D extrude with plastic shading and 1 blend step.
New 3D lighting lacks shading options and blend steps.
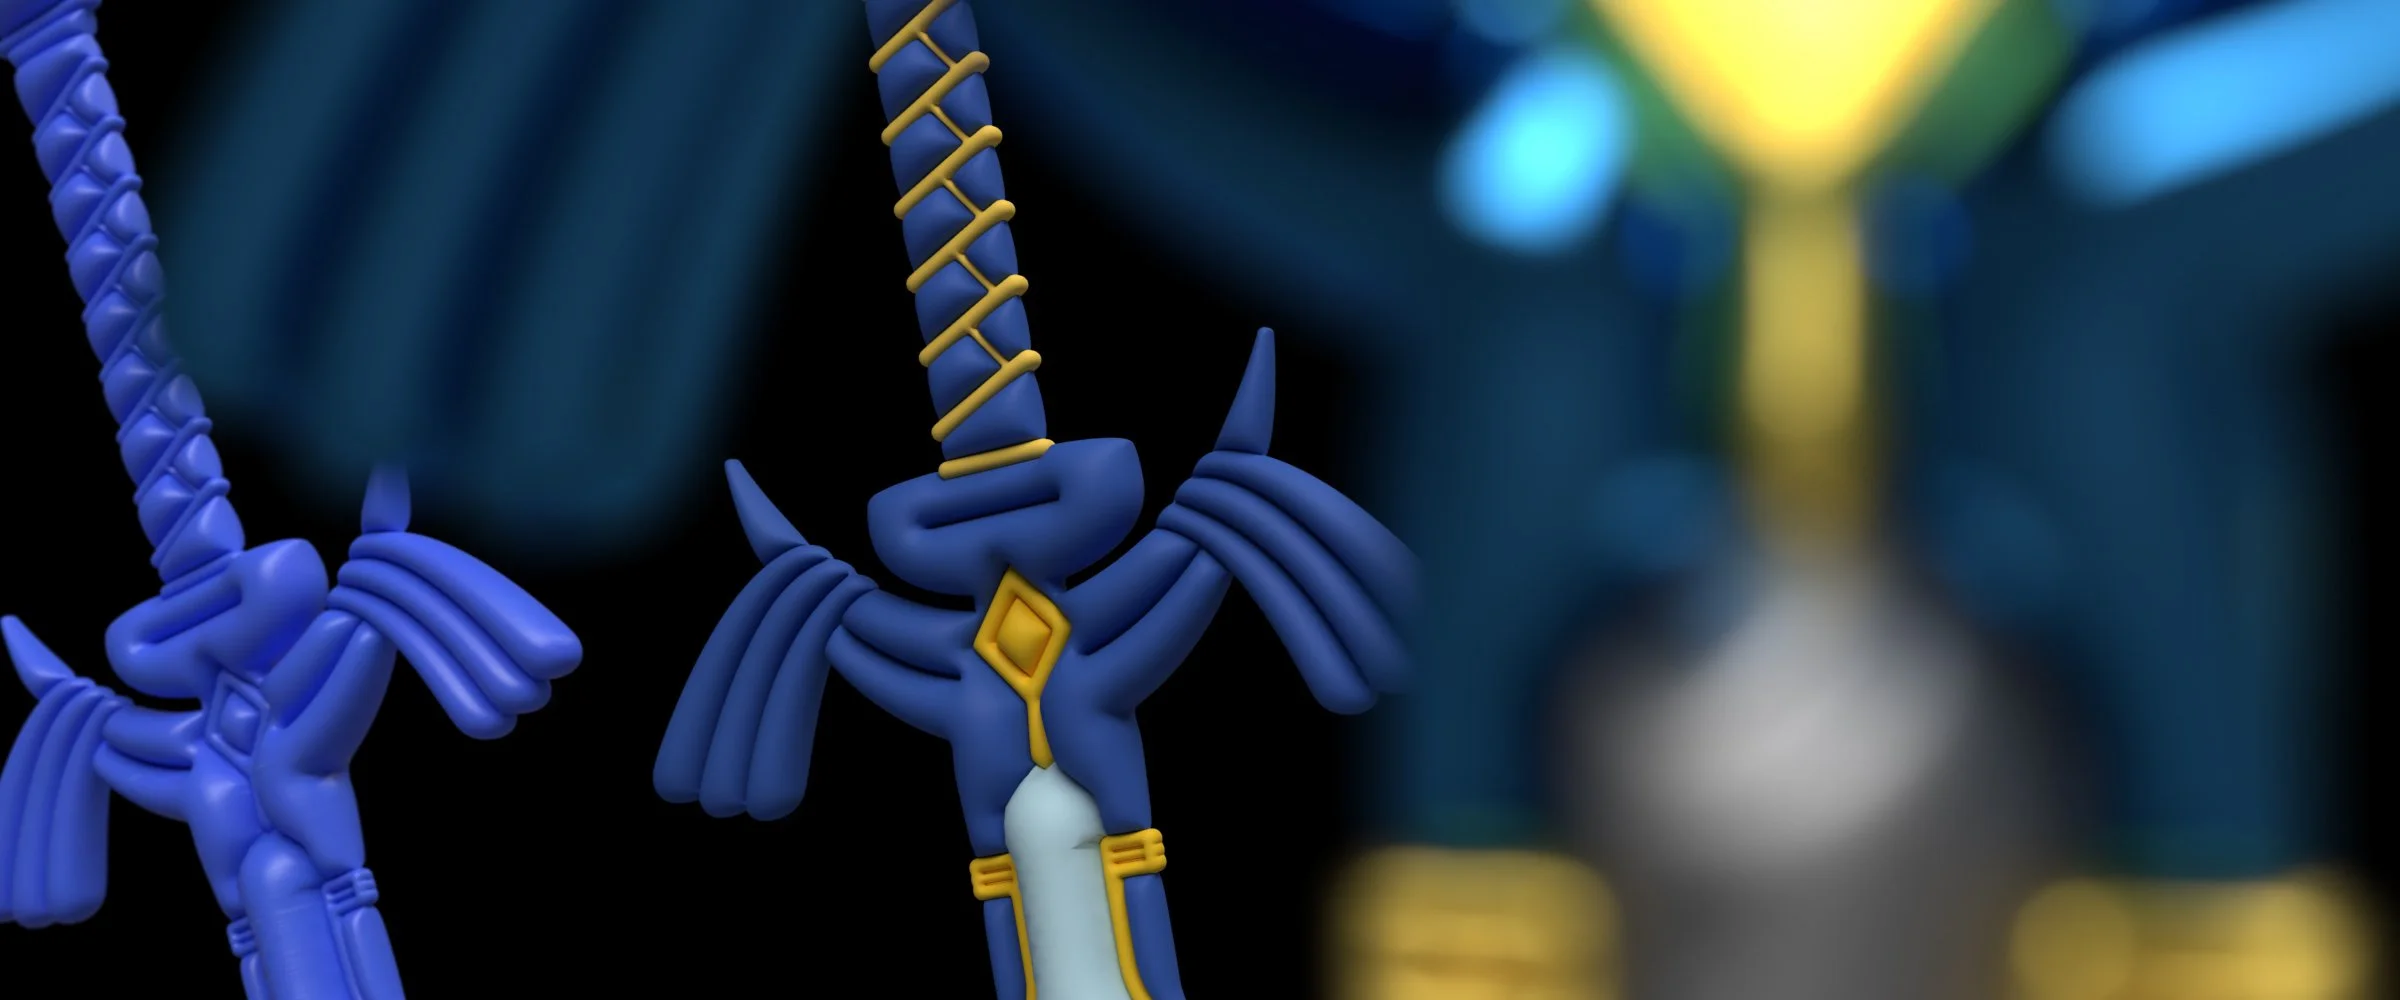
Multiple 3D objects (don't bother)
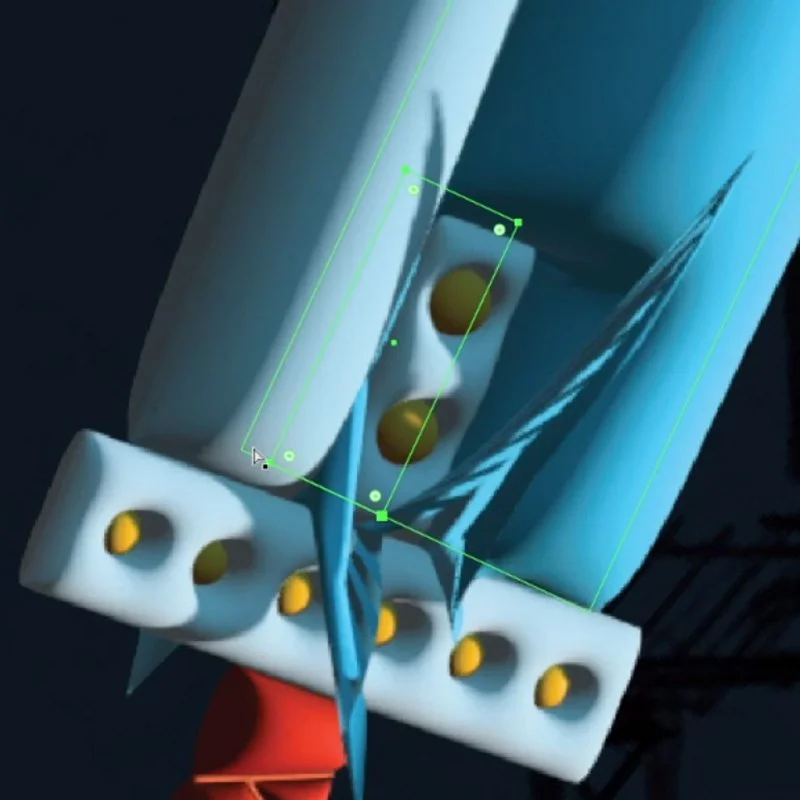
The examples above are a single extrusion. It’s not possible to have separate 3D objects and build a scene where 2 or more objects reflect and cast shadows on each other in the same 3D space. The crossed swords below illustrate this problem in Illustrator.
Scenes with multiple objects would need to be assembled in Dimension.
Additionally, shadows take forever to render 🫠.
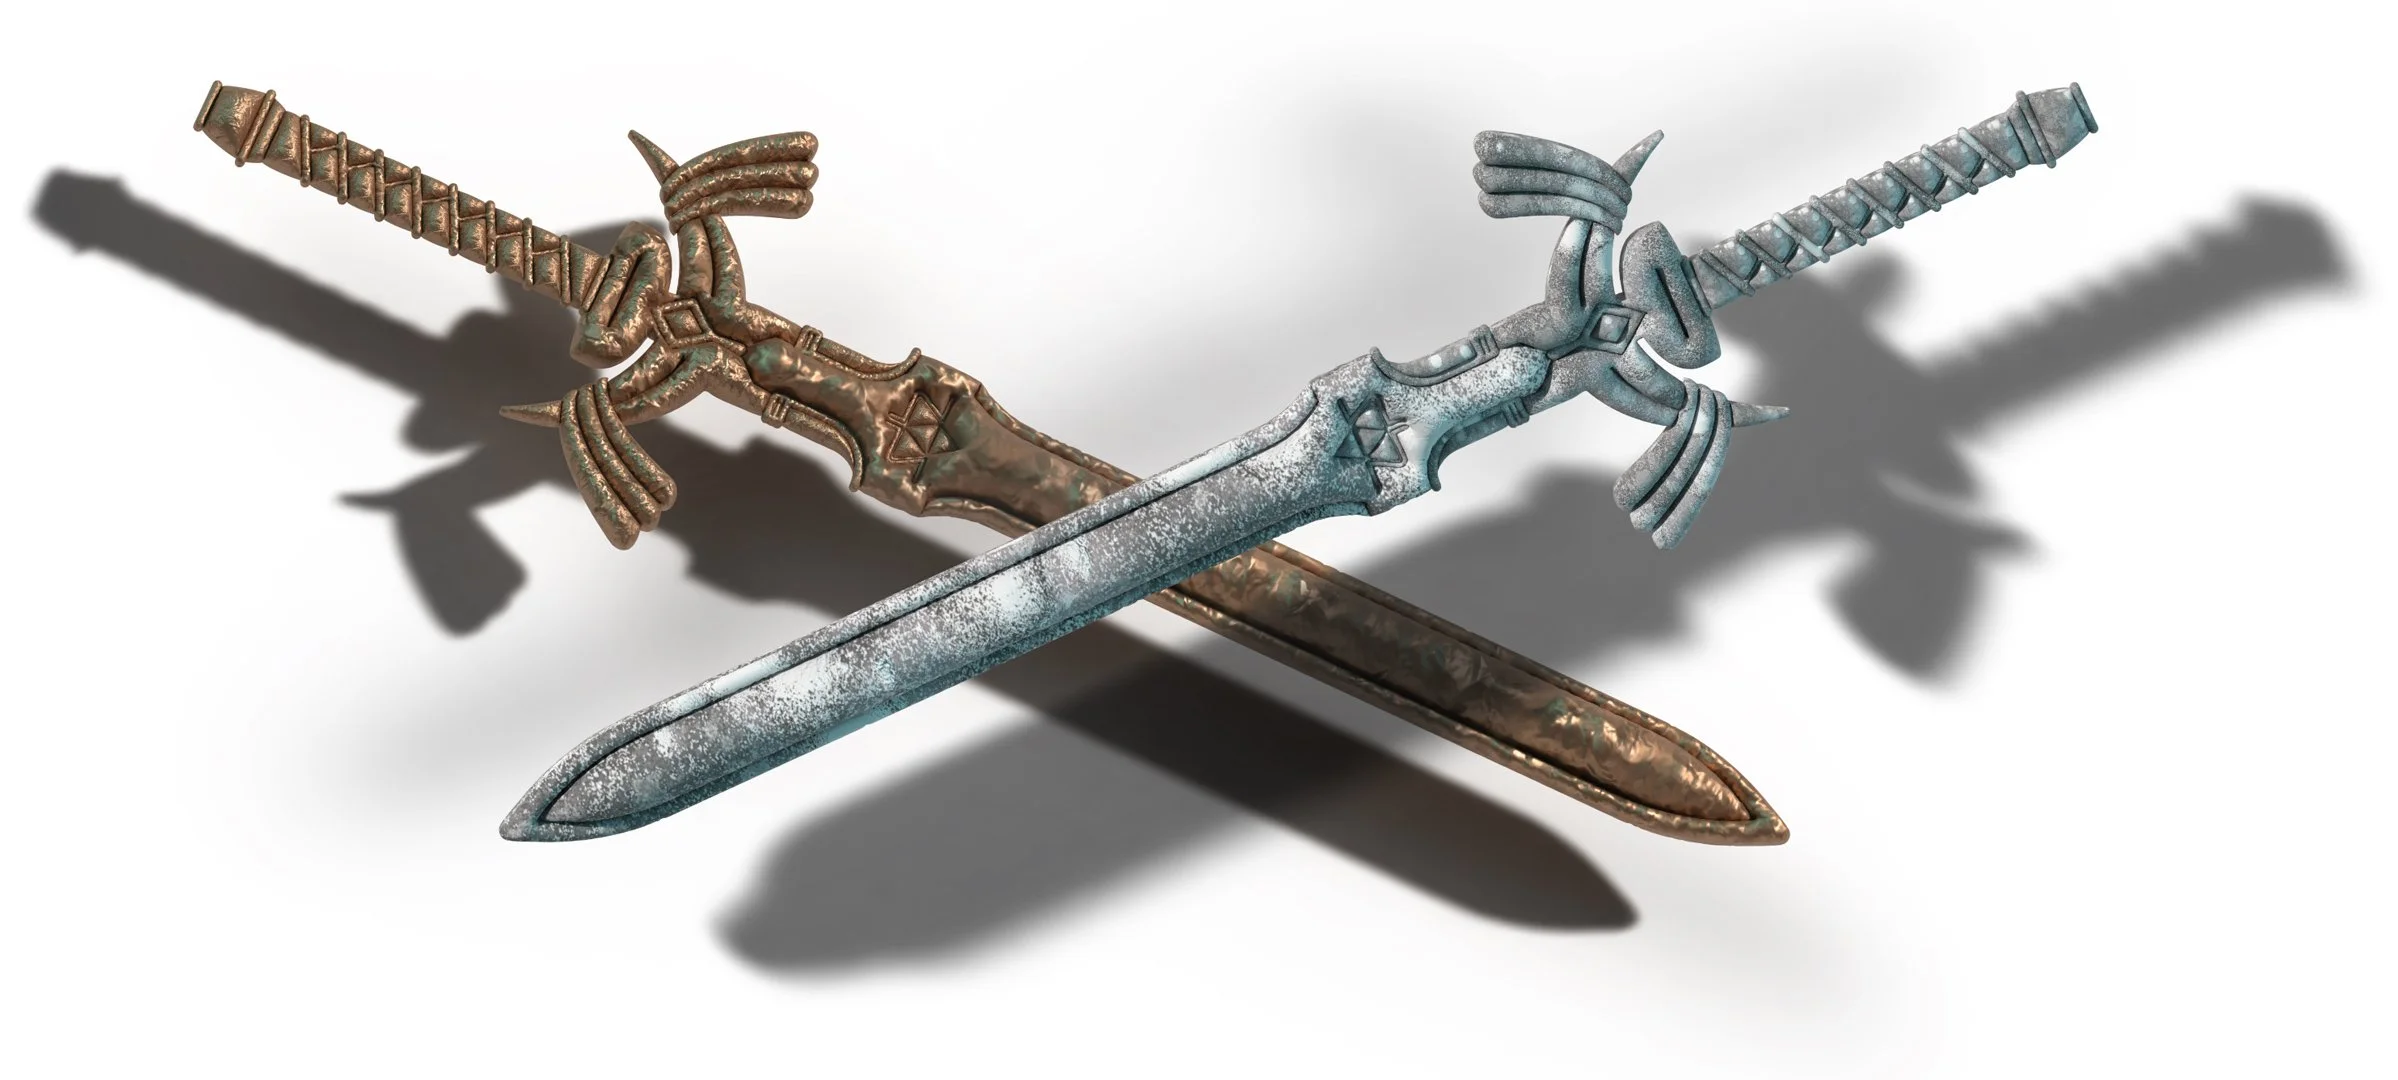
3D object lighting and shadows can’t interact or share a common light source.
Rendering
I often work at a smaller size armed with the knowledge that vectors can scale up without a loss in quality. That’s not entirely true when working with 3D models.
The size of the 3D object on the art board determines the final quality of the output because it’s a rasterized version of the object’s vectors. Larger artwork will result in a much cleaner, more defined rendering.
However, there are a couple ways to improve the quality.
Upsizing and Upscaling
Below is the same blade detail from the Master Sword rendered in high quality on the art board (at the default 300ppi document raster setting) at 400px, 800px, and 1600px, then upsized during export to 4800px. Smaller vectors upsized during export will never match the quality of the larger vectors if both are saved to the exact same size.
400px original exported at 4800px (1200% larger)

800px original exported at 4800px (600% larger)

1600px original exported at 4800px (300% larger)
There was a massive difference in rendering times between the three swords (on a MacBook Pro M1 32GB):
400px took 10 seconds to render
800px took 24 seconds to render
1600px took over 8 minutes to render
The best advice is to work at whatever canvas and size best fits the design, keeping in mind the quality won’t be improved (3D isn’t rendered in larger, higher quality) by upsizing when exporting.
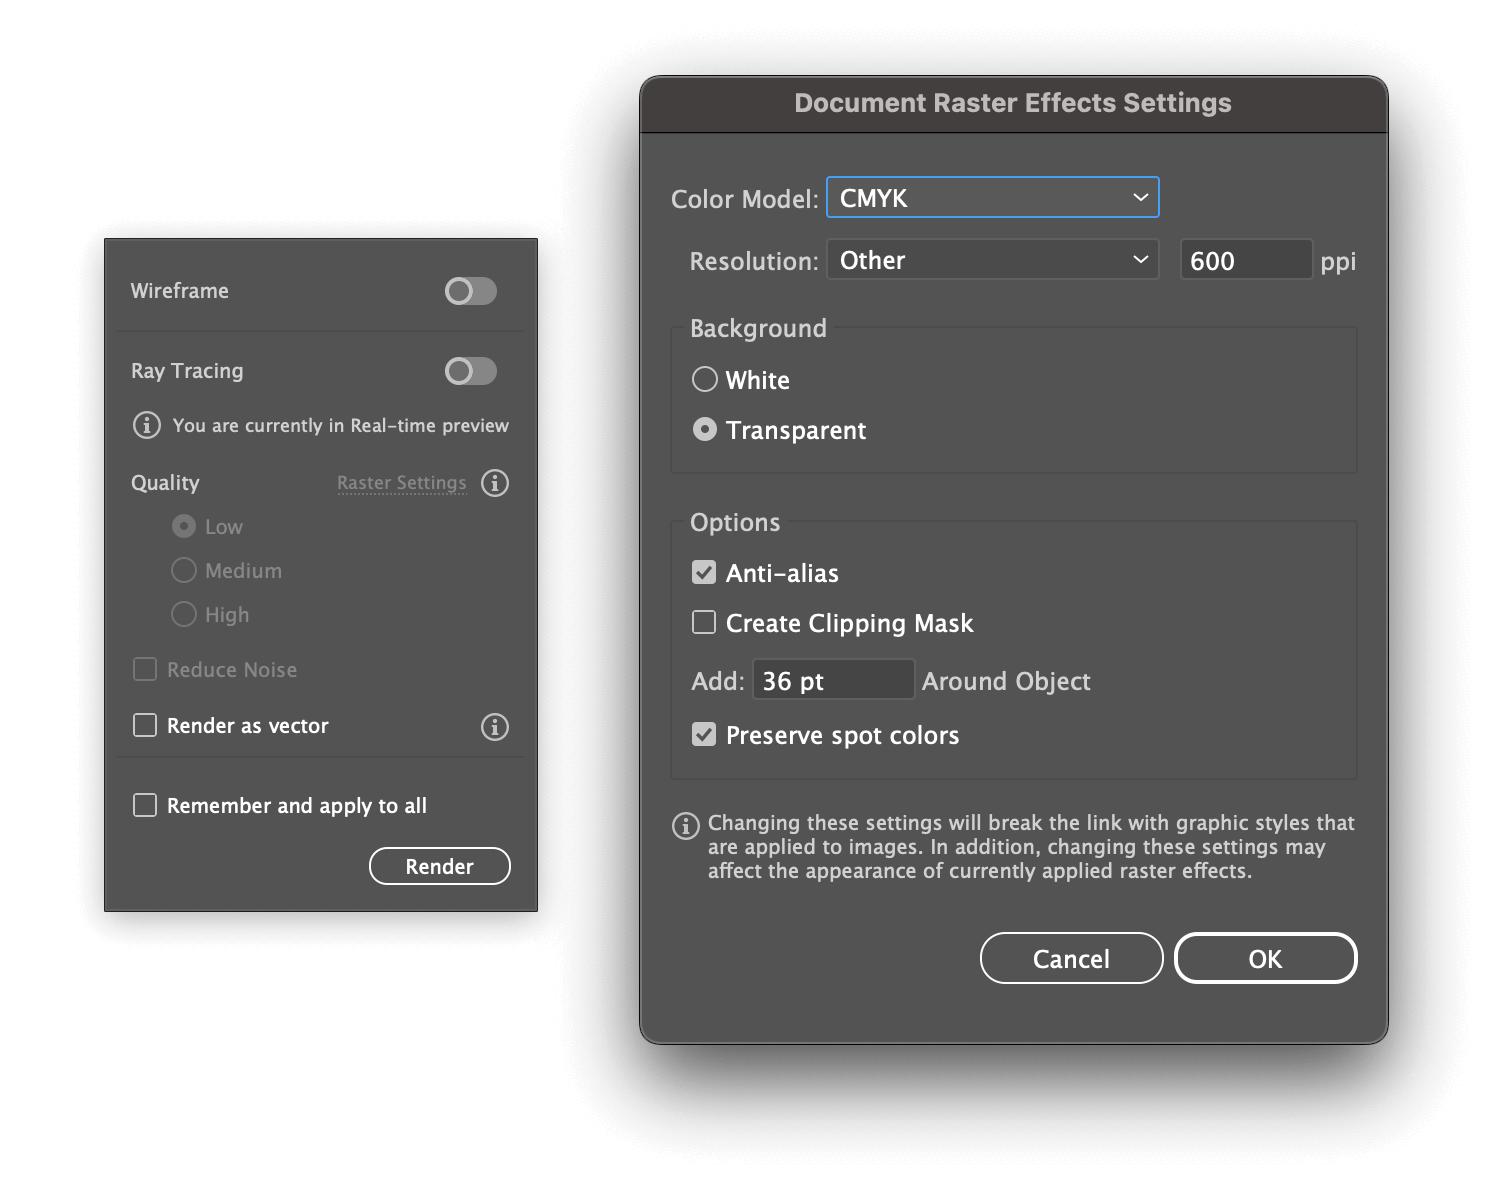
Raster Effect Settings
But if you do need to upscale things without resizing everything, consider adjusting the Document Raster Effect Settings. It’s a feature found in the ray tracing menu and under the main menu: Effect > Document Raster Effect Settings.
Achieve higher quality 3D renders from smaller objects (like the 400px sword from above) by setting the ray tracing resolution selector to something higher then 300ppi. Be mindful when setting this because every effect on the art board will be updated… it may take a while.
Here is the same 400px Master Sword with the document raster effects resolution set to the 300dpi (default), 600dpi, and 1200dpi. The render times are still brutal at higher ppi, so choose your fate.

400px Master Sword at 300ppi.
400px Master Sword at 600ppi.
400px Master Sword at 1200ppi.
Exporting
Exporting doesn’t need to be the end of the illustration. Use the Export 3D object… option from the 3D panel and you’ll have an asset that can be opened in other 3D programs—specifically Adobe Dimension.
Note: You won’t be able to manually drag the 3D object into the Asset Export panel, you have to use the Export 3D object button. You can select additional export types once you do (png, jpg, etc.).

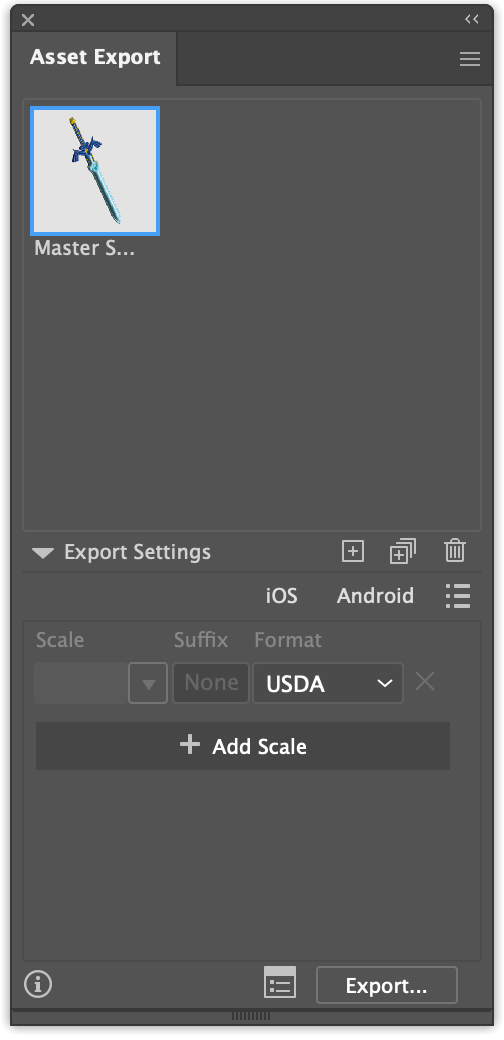
The export format will default to USDA, which is a friendly 3D format for Dimension and other applications. There are a few other formats to choose from, so use whichever suits your 3D needs. Select the thumbnail(s) of the artwork and press the Export button.
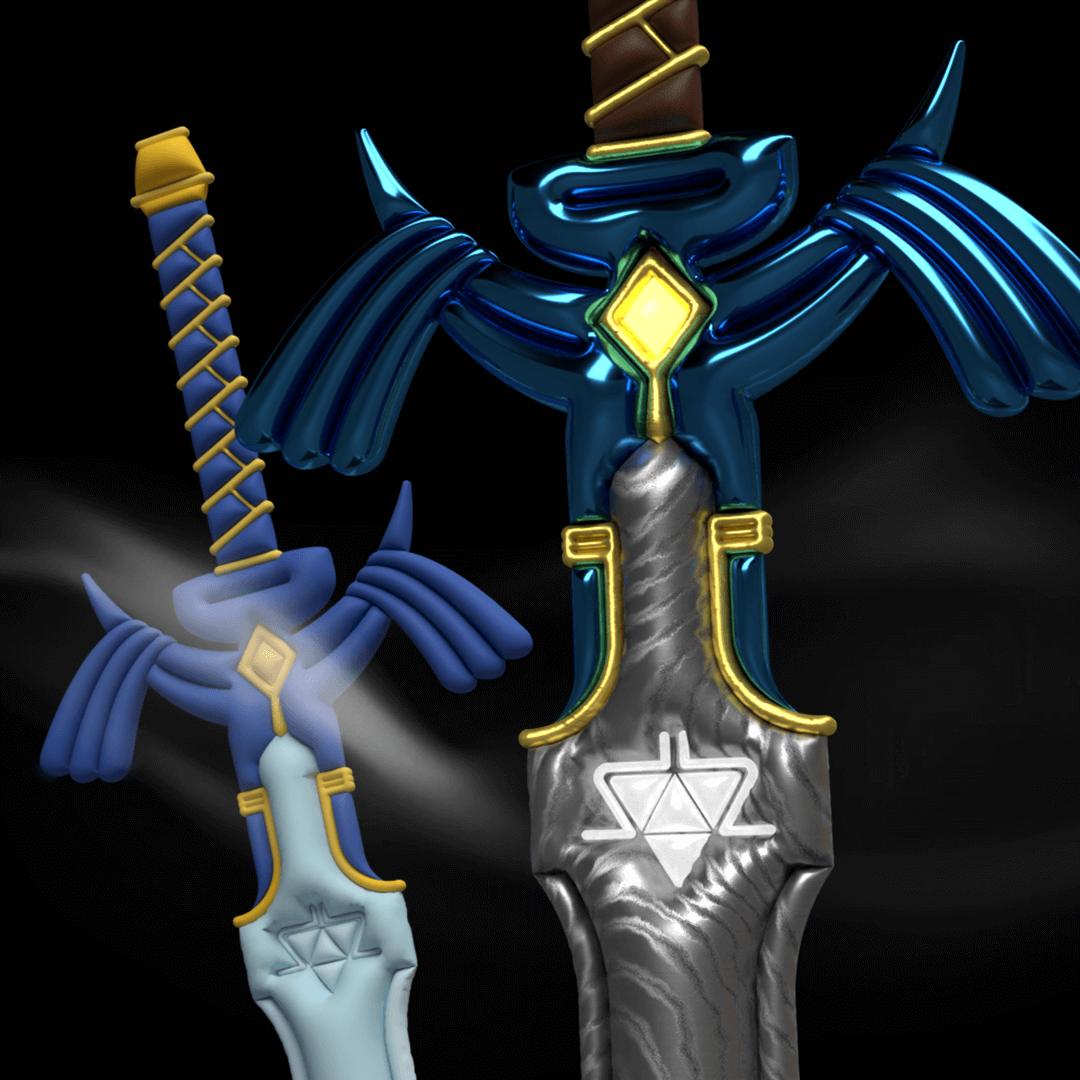
Refining in Adobe Dimension
Illustrator’s 3D capabilities really shine once you combine them with Adobe Dimension.
Adobe Dimension offers more advanced lighting, reflections, and material controls than Illustrator’s simple 3D engine.
Import the USDA file into Adobe Dimension and refine your object using the more powerful Substance materials that Illustrator just can’t handle.
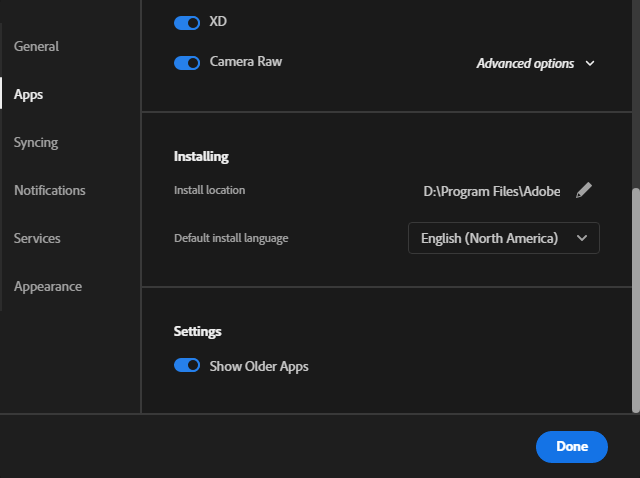
Dimension is part of the usual Adobe subscription and can be found in the Creative Cloud apps. Toggle the Show Older Apps if you don’t see it in the list on PC.
Adobe has not made it easy to find Dimension however, likely because it was surpassed by their powerful Substance 3D tools — which cost an additional $50/month — a hefty price to pay for someone who rarely dabbles in 3D.
Open your 3D file in Dimension
Load your 3D file into Dimension with File > Import > 3D Model (Ctrl+i or ⌘+i) and find the USDA file you saved earlier. The 3D model will look like it did in Illustrator.

Freshly imported USDA Master Sword in Dimension
Note: If this is unfamiliar territory, be sure to go through some intro tutorials to get up to speed.
Dimension comes loaded with a bunch of great standard materials. Additionally, if you downloaded any Adobe Stock materials (and added them to your library) they will be available by switching from Starter Assets to Libraries.
Selecting and applying materials
To set individual materials, double click each part of the 3D model (or select in the Scene layers panel) and simply choose a new material. Any parts that were contiguous by color will behave as single pieces here.
For example, the blue sword crossguard is treated as one whole piece. Whereas the sword grip was one piece in Illustrator, yet in the 3D model each leather segment is separated by small line segments, making each division a unique element that must have color applied separately.
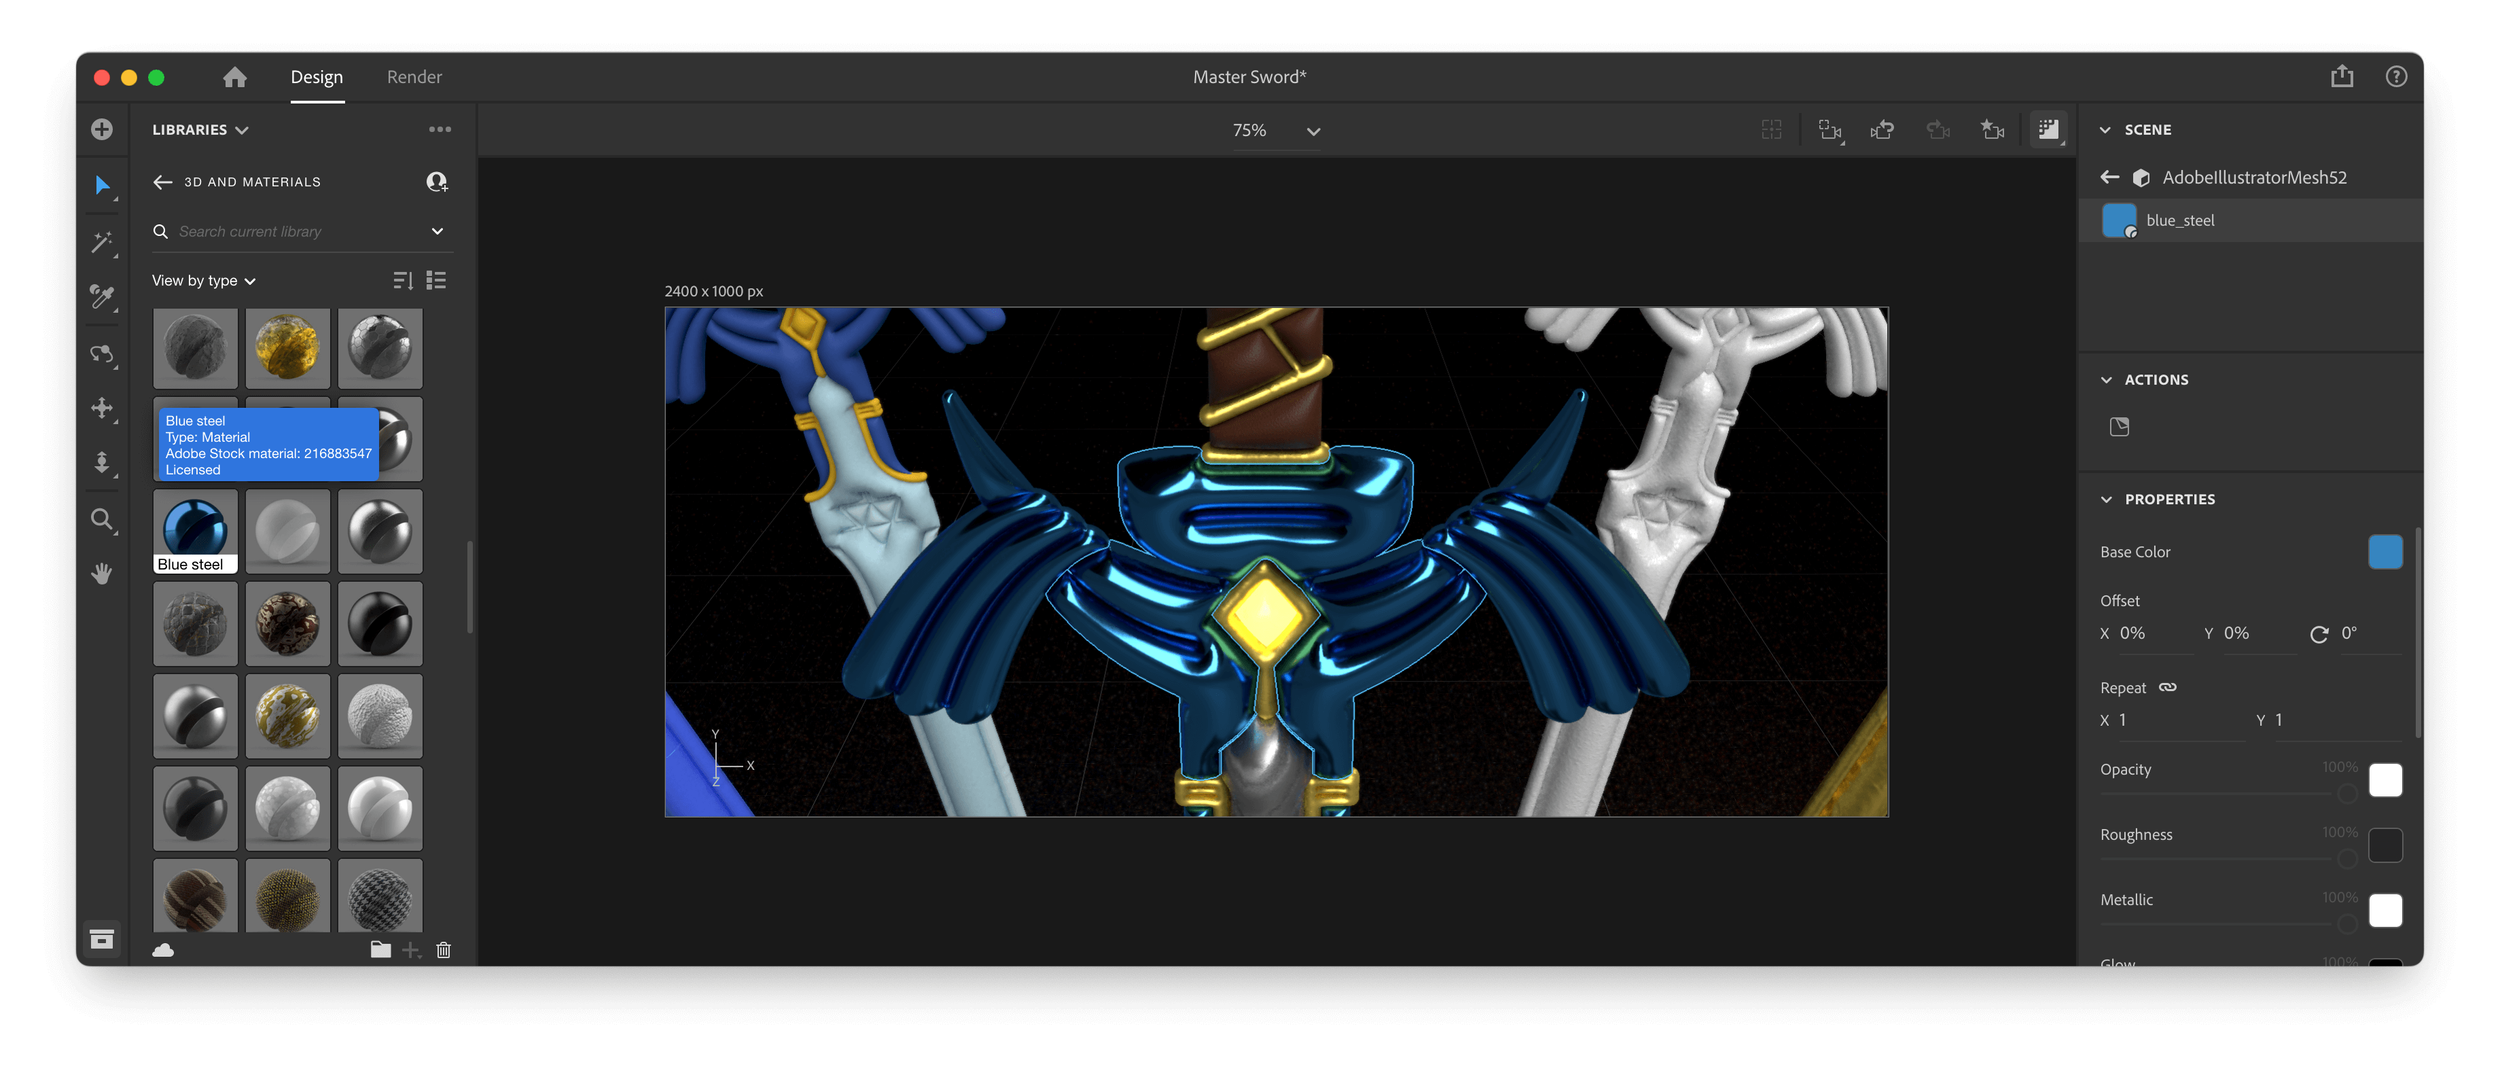
Selecting an object and choosing a material will apply the material over the entire model.
Explore the properties for each material and change things to match your vision, including the Glow property and more.
Get creative
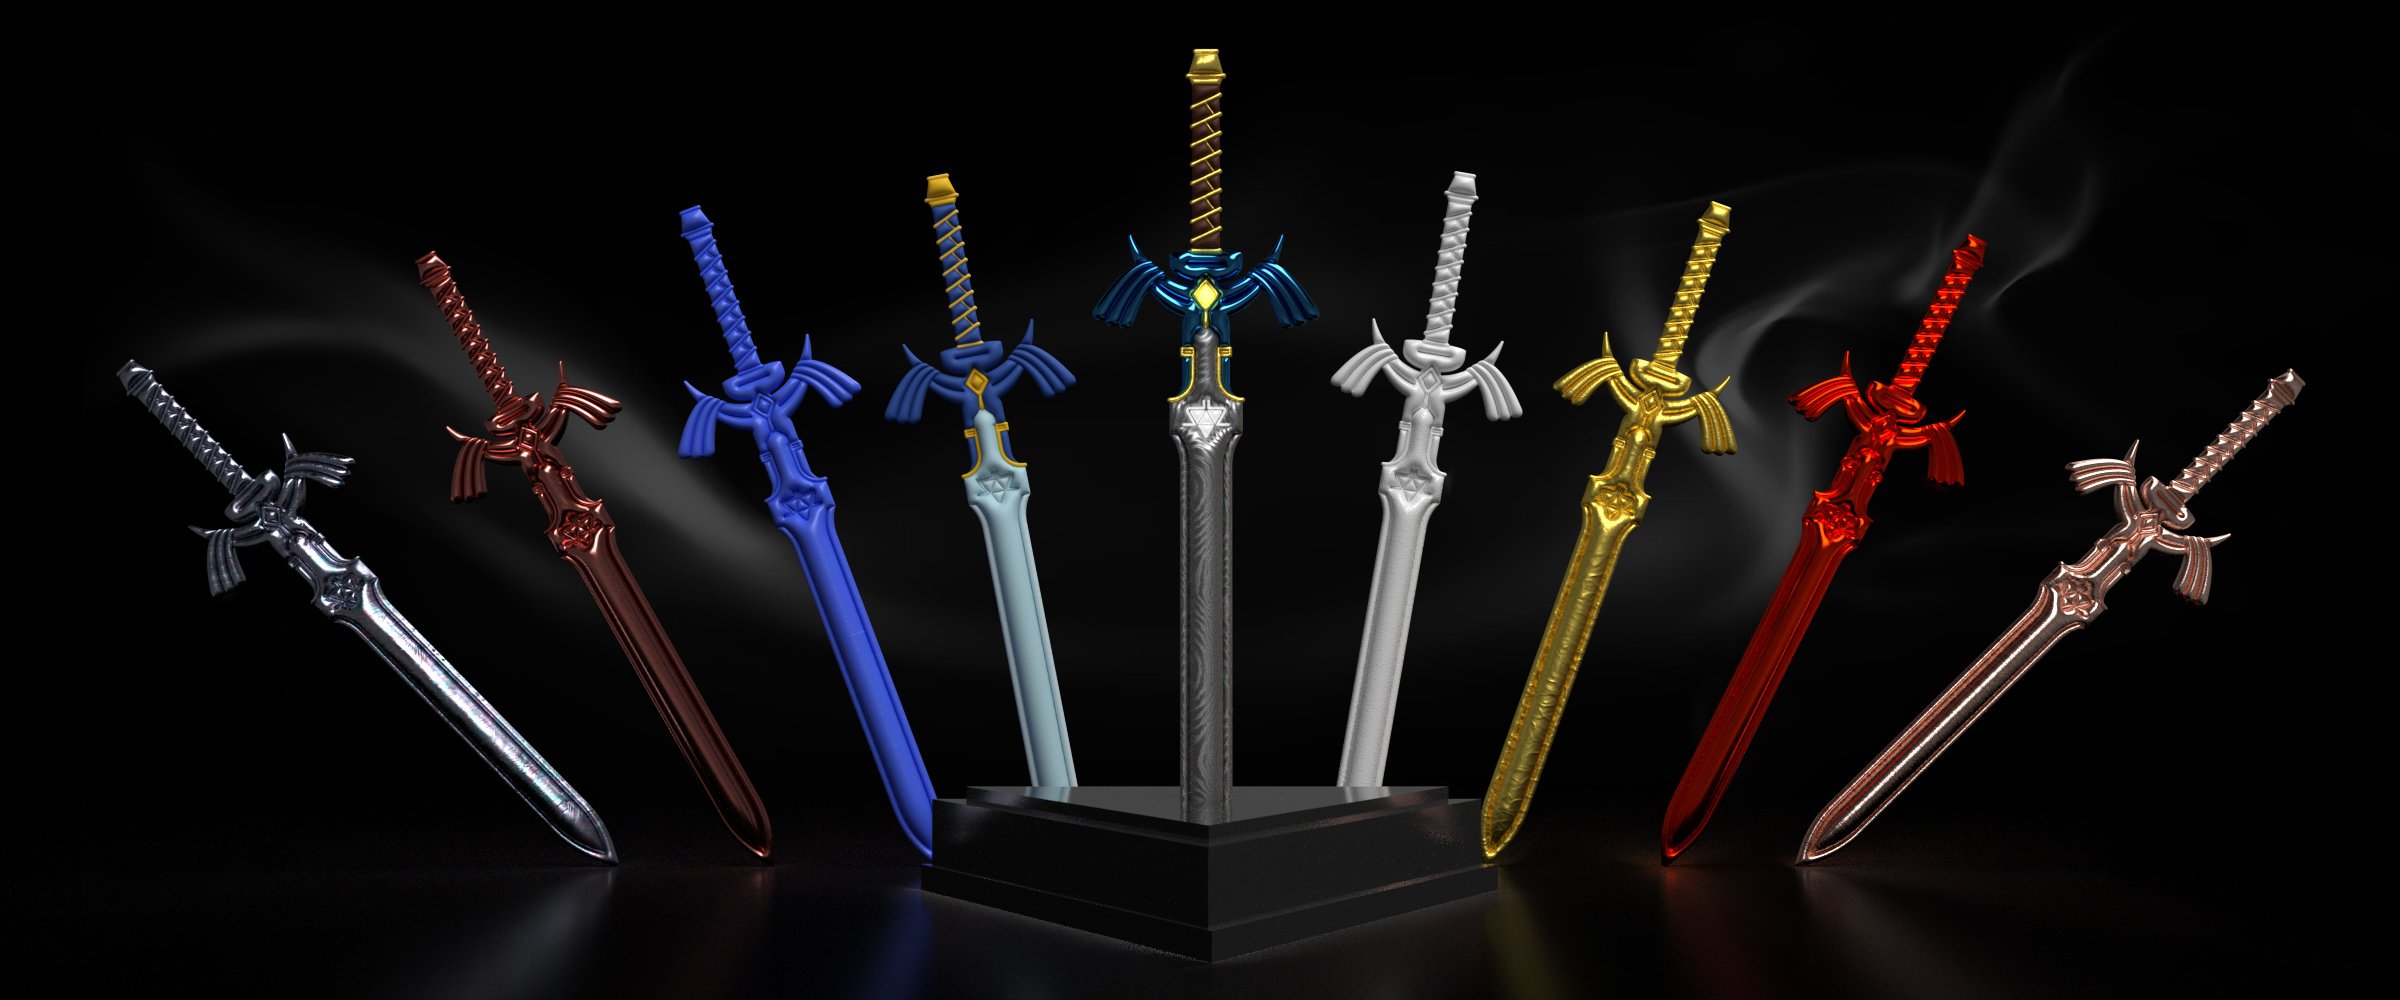
With a few creative camera angles and some lighting and scene adjustments, the results can be pretty fantastic. The rendering time in Dimension is so much better than Illustrator as well. These took less than 6 minutes from start to finish at high quality, 2400px × 1000px each.


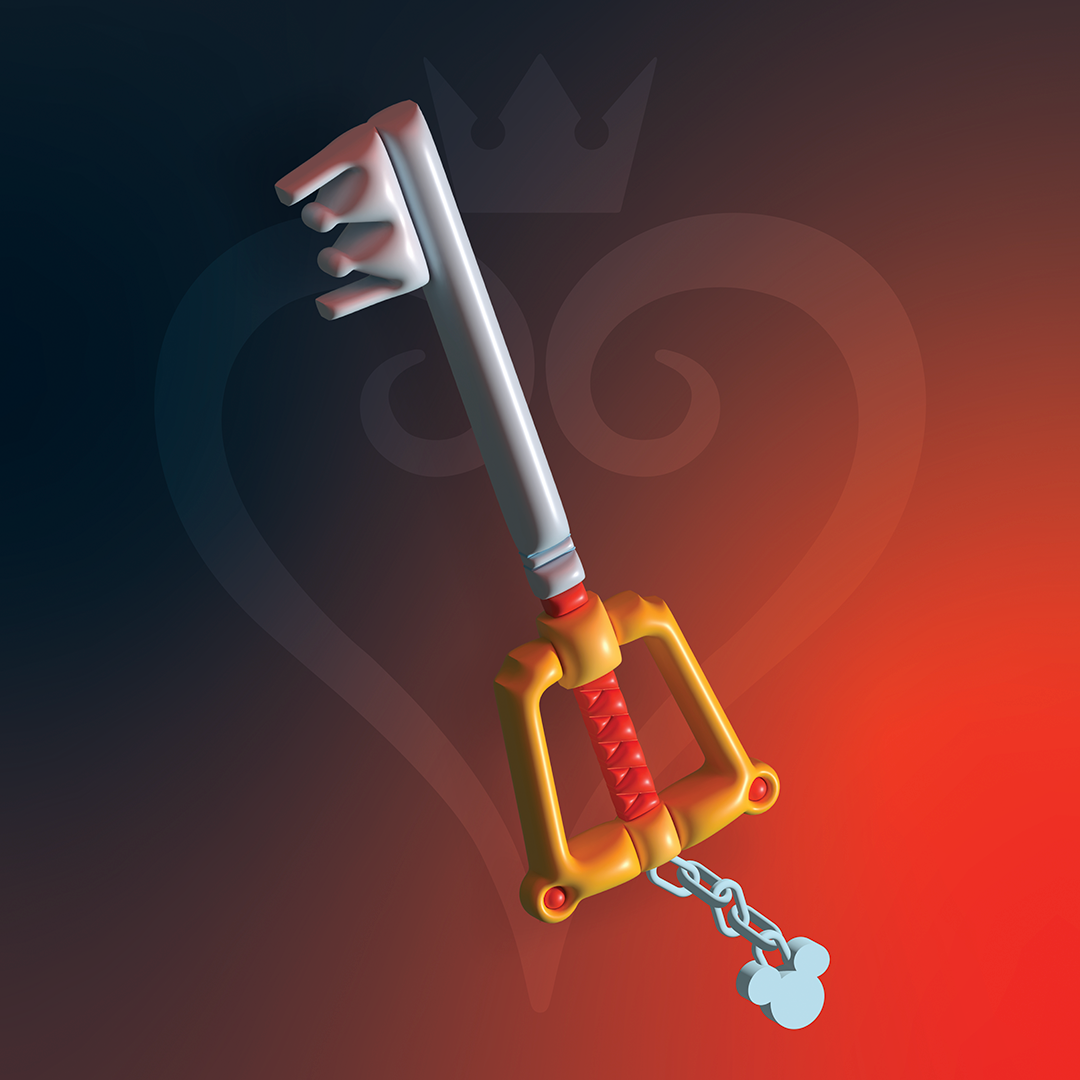
And before this gets wrapped up, here are a few other swords from my series of Iconic Video Game Weapons Except Made by Fisher Price.


Wrapping up
These could all be pushed even further in Dimension by modifying the 3D model thicknesses (i.e. sharp blades instead of balloons), or importing multiple pieces to reassemble into a proper 3D form, but wow, look at the time! Despite Illustrator being a little slow and clunky, it’s a fantastic way to do some lightweight 3D.
Thanks for reading!